


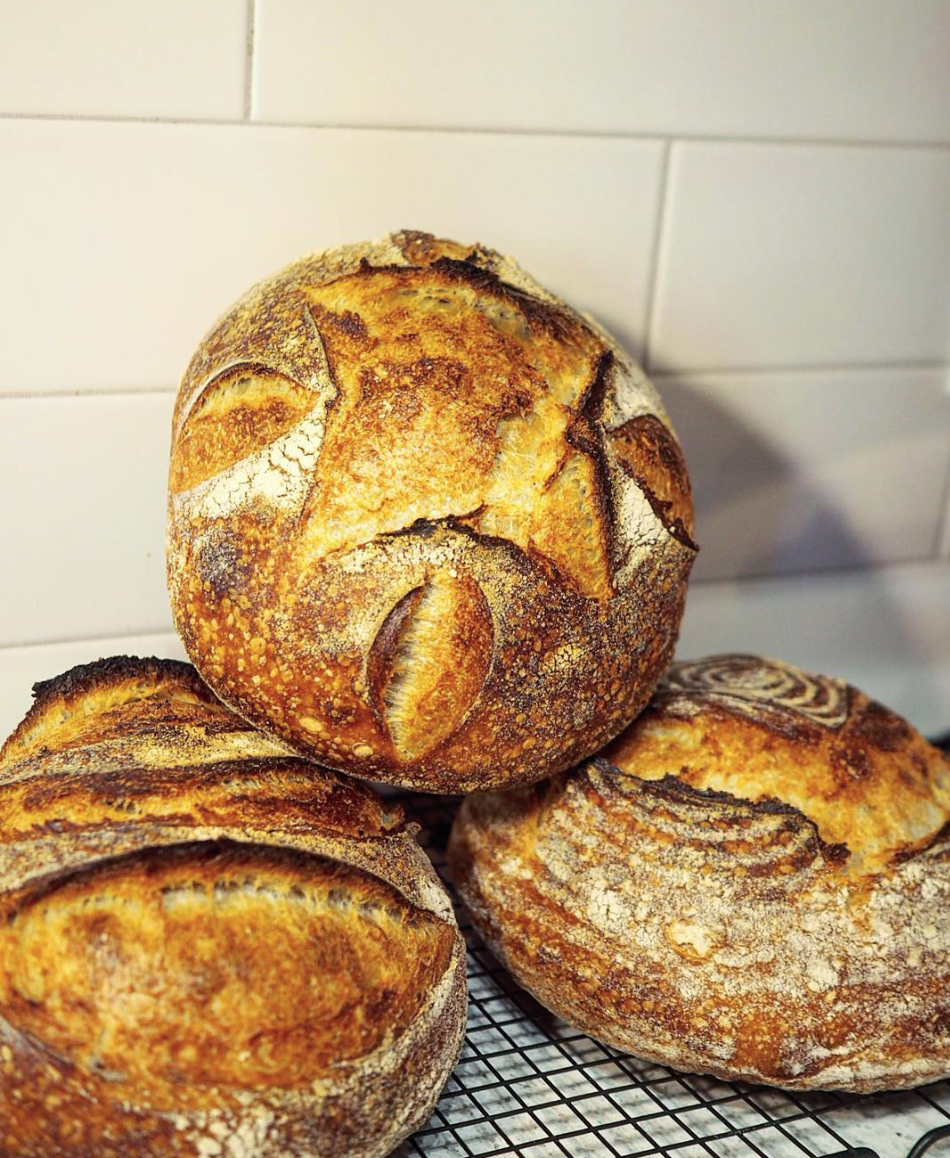
Sourdough Bread Recipe Packet
Chef Luca’s sourdough bread recipes

Make it stand out
Whatever it is, the way you tell your story online can make all the difference.


Puff Pastry
Ingredients
Butter Block
14 oz butter (room temp, cubed)
1/2 cup AP flour
Détrempe (dough)
2 3/4 cups AP flour
1 1/4 tsp salt
6 oz butter (cold, cubed)
1 cup cold water (might not need all)
Equipment and tools
Stand mixer, bowl, paddle, hook
Bowl scraper or rubber spatula
1 sheet parchment paper
Plastic wrap
Rolling pin
Pastry brush (optional)
Sheet pan
Directions
BUTTER BLOCK
Take one sheet of parchment paper, fold in half. Then fold down each edge so that you are left with a 7”x7” square. Unfold and set aside.
Combine the 14 ounces of room temp, cubed butter with 1/2 cup of flour in bowl of stand mixer. Use paddle to beat until all flour is incorporated and butter is creamy.
Using bowl scraper, remove butter mix and spread in the center of the square on the parchment paper. Fold paper over butter and tuck edges under. Flip packet over and roll butter to fill the square in one even layer. Set aside.
DÉTREMPE
Using same bowl, add 2 1/2 cups flour, 1 1/4 teaspoon salt and the 6 ounces of cold, cubed butter. Using paddle on low speed, mix until flour turns golden in color, and mixture looks like sand, with a few slightly larger pieces of butter (no bigger than small peas).
Remove paddle attachment and replace with dough hook. Turn mixer on lowest speed, and pour in all but the last 1/4 cup of water. Allow to mix for a bit to see if more water is needed. If dough looks quite dry after a minute of two add more water.
Allow to mix until the dough is uniform, soft, slightly tacky, and is cleaning away from sides of bowl.
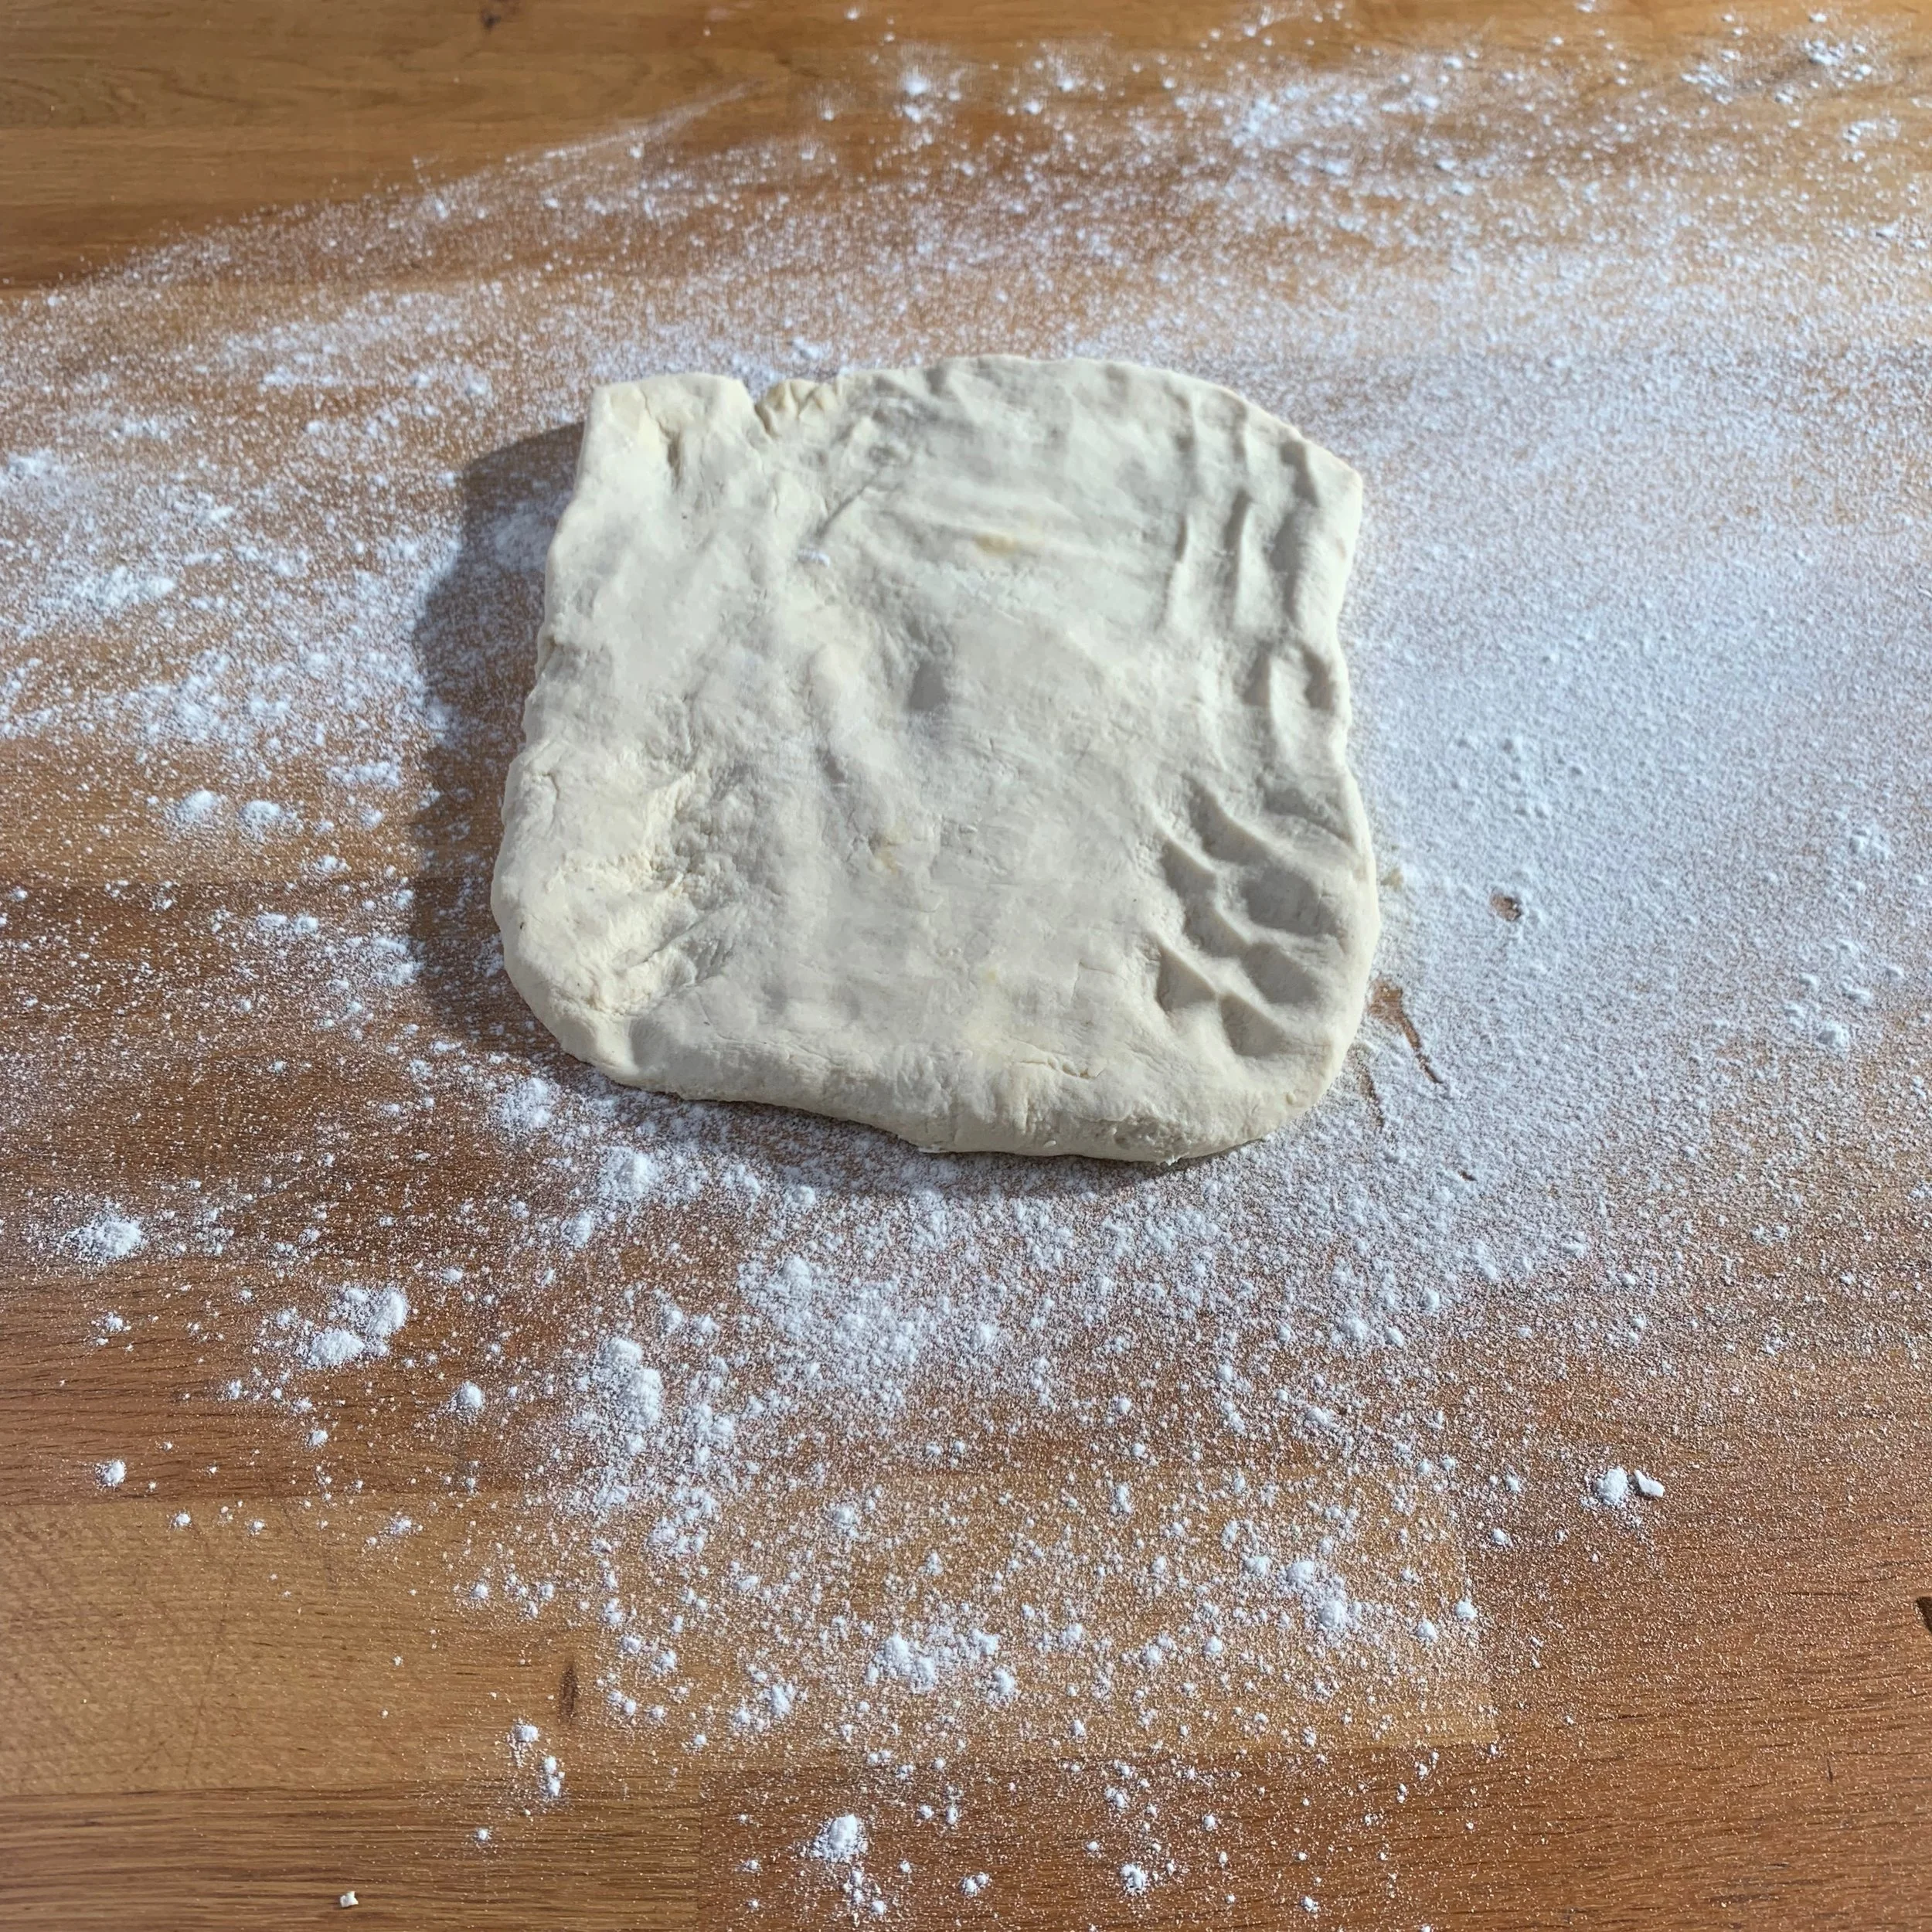
Lightly flour the countertop or wooden board and scrape the dough onto the flour. Dust the top with flour if it seems overly tacky/sticky. Fold over a few times and very lightly knead dough. Roll out to a square about the same size as your butter packet. Wrap with plastic wrap.
Place détrempe and butter pack in fridge for 20 minutes max. Both should be firm, but pliable when done chilling.
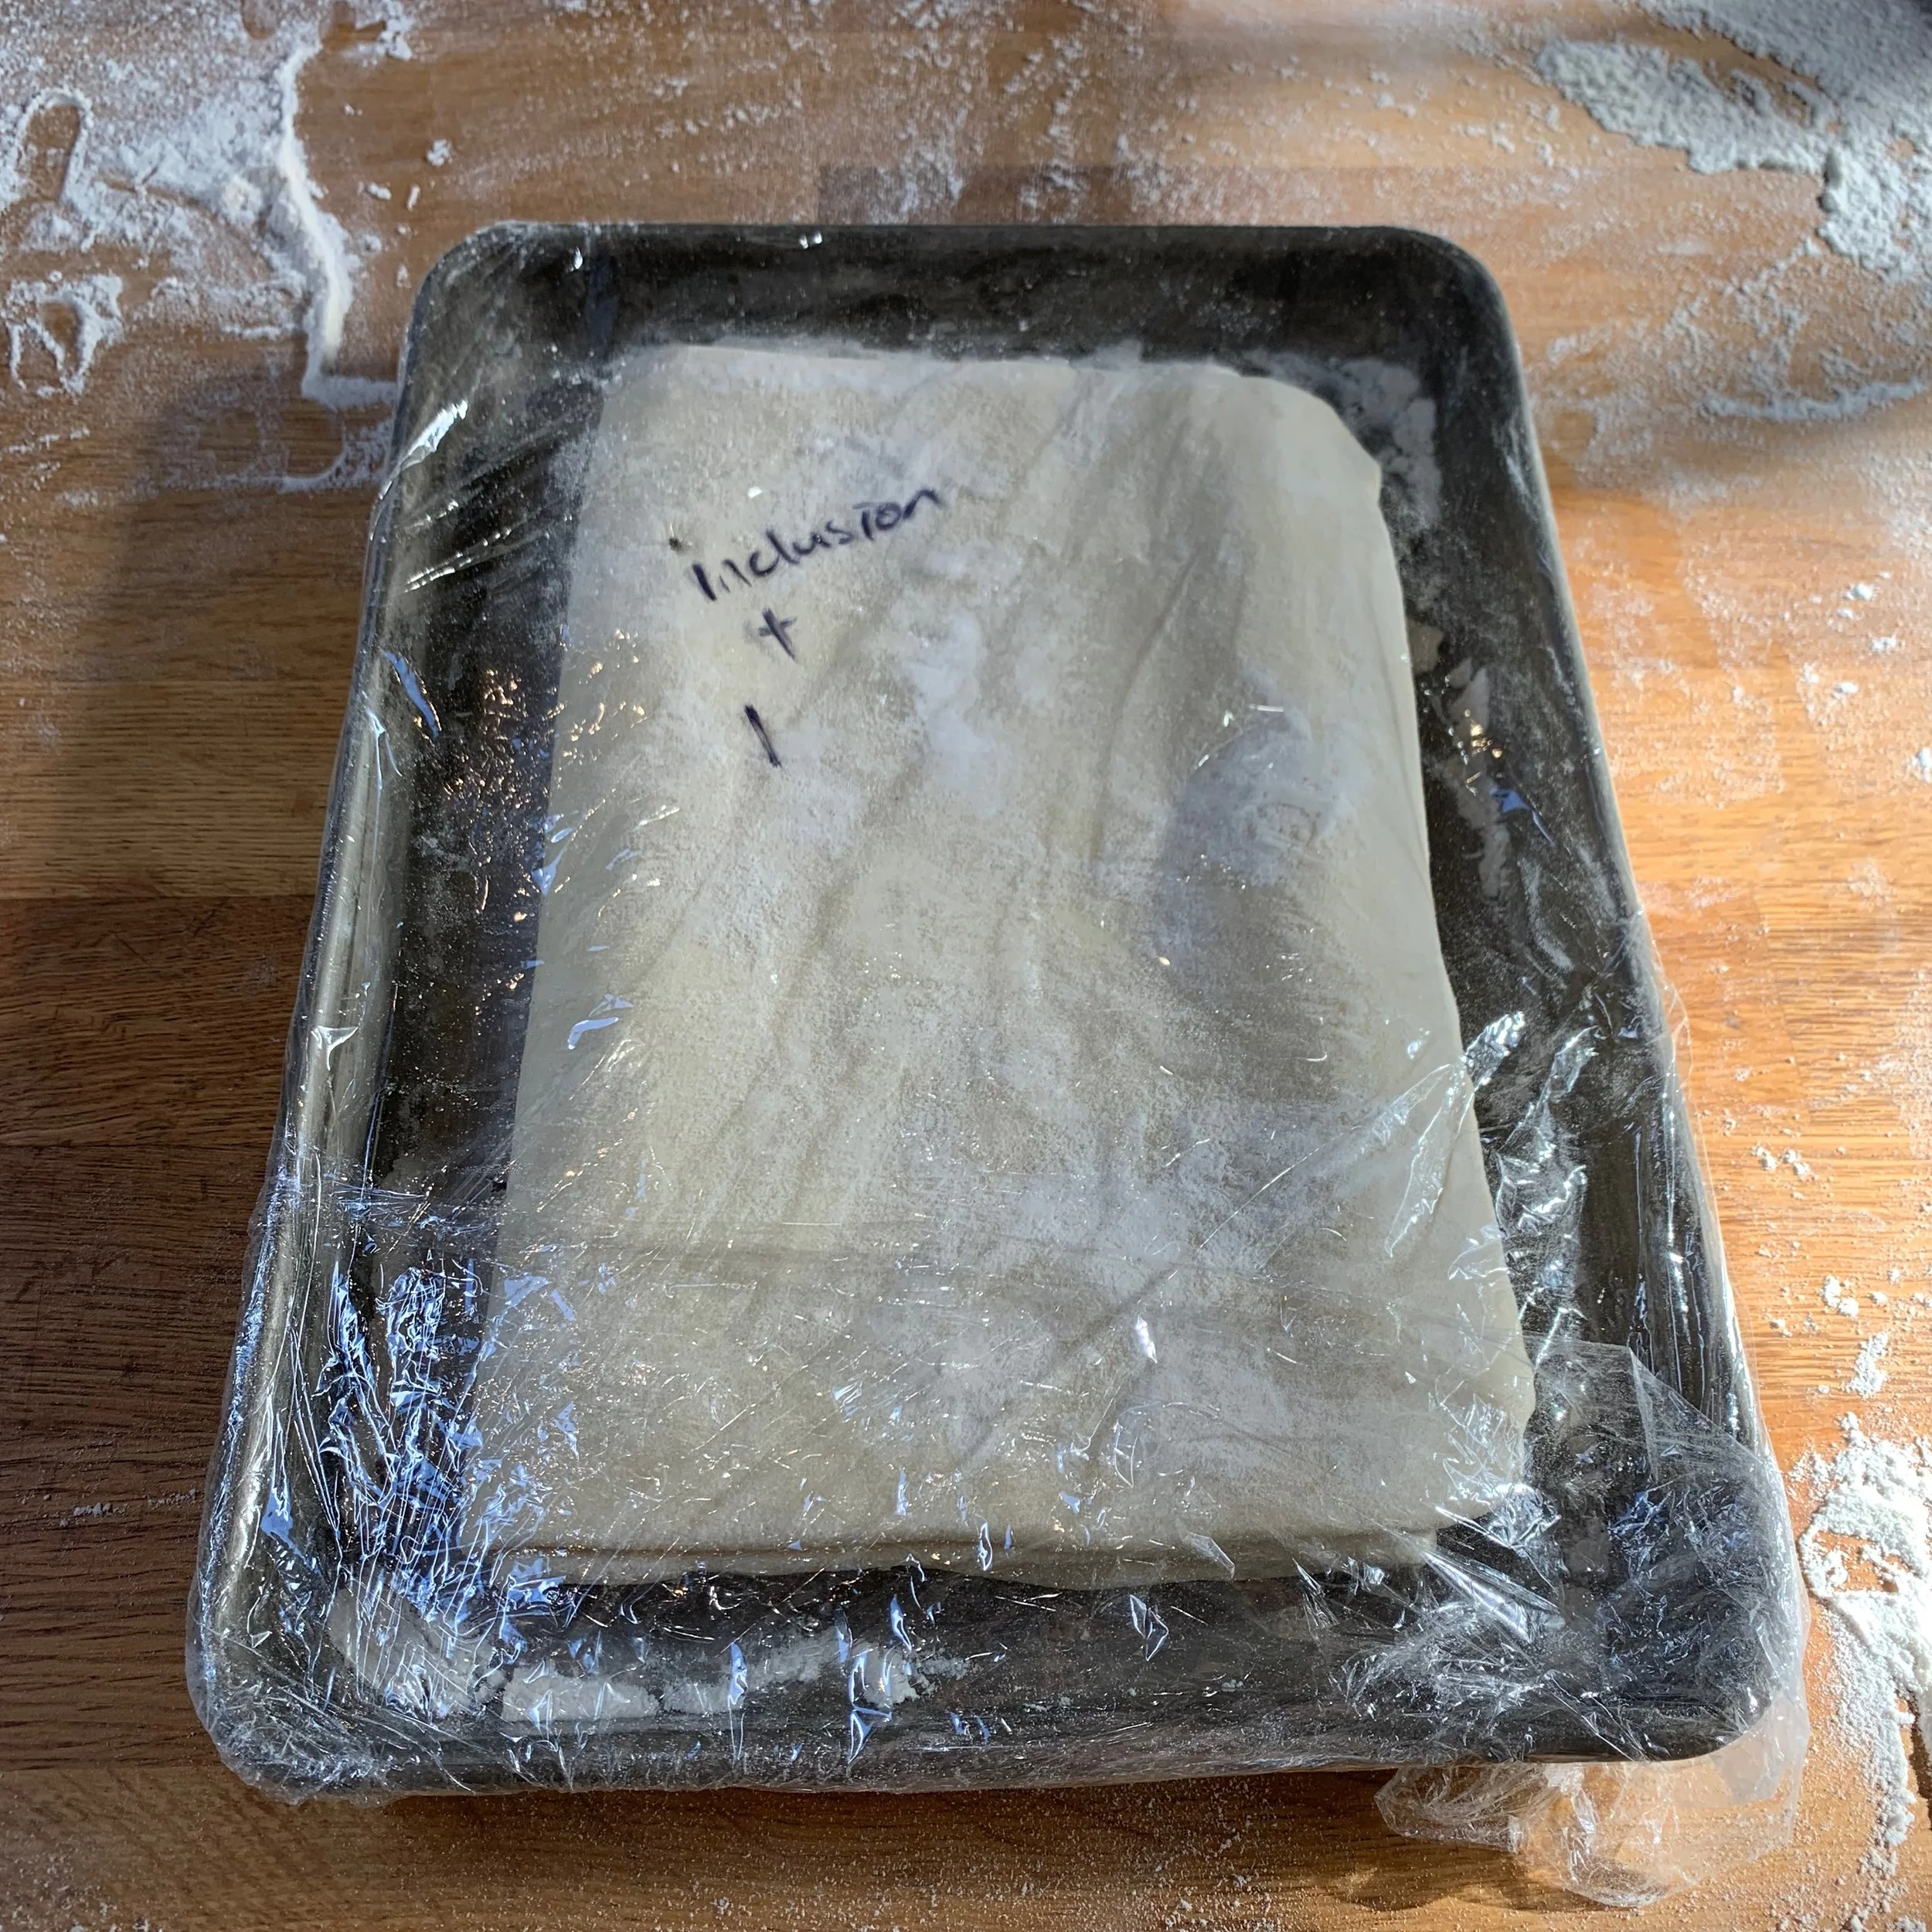
INCLUSION
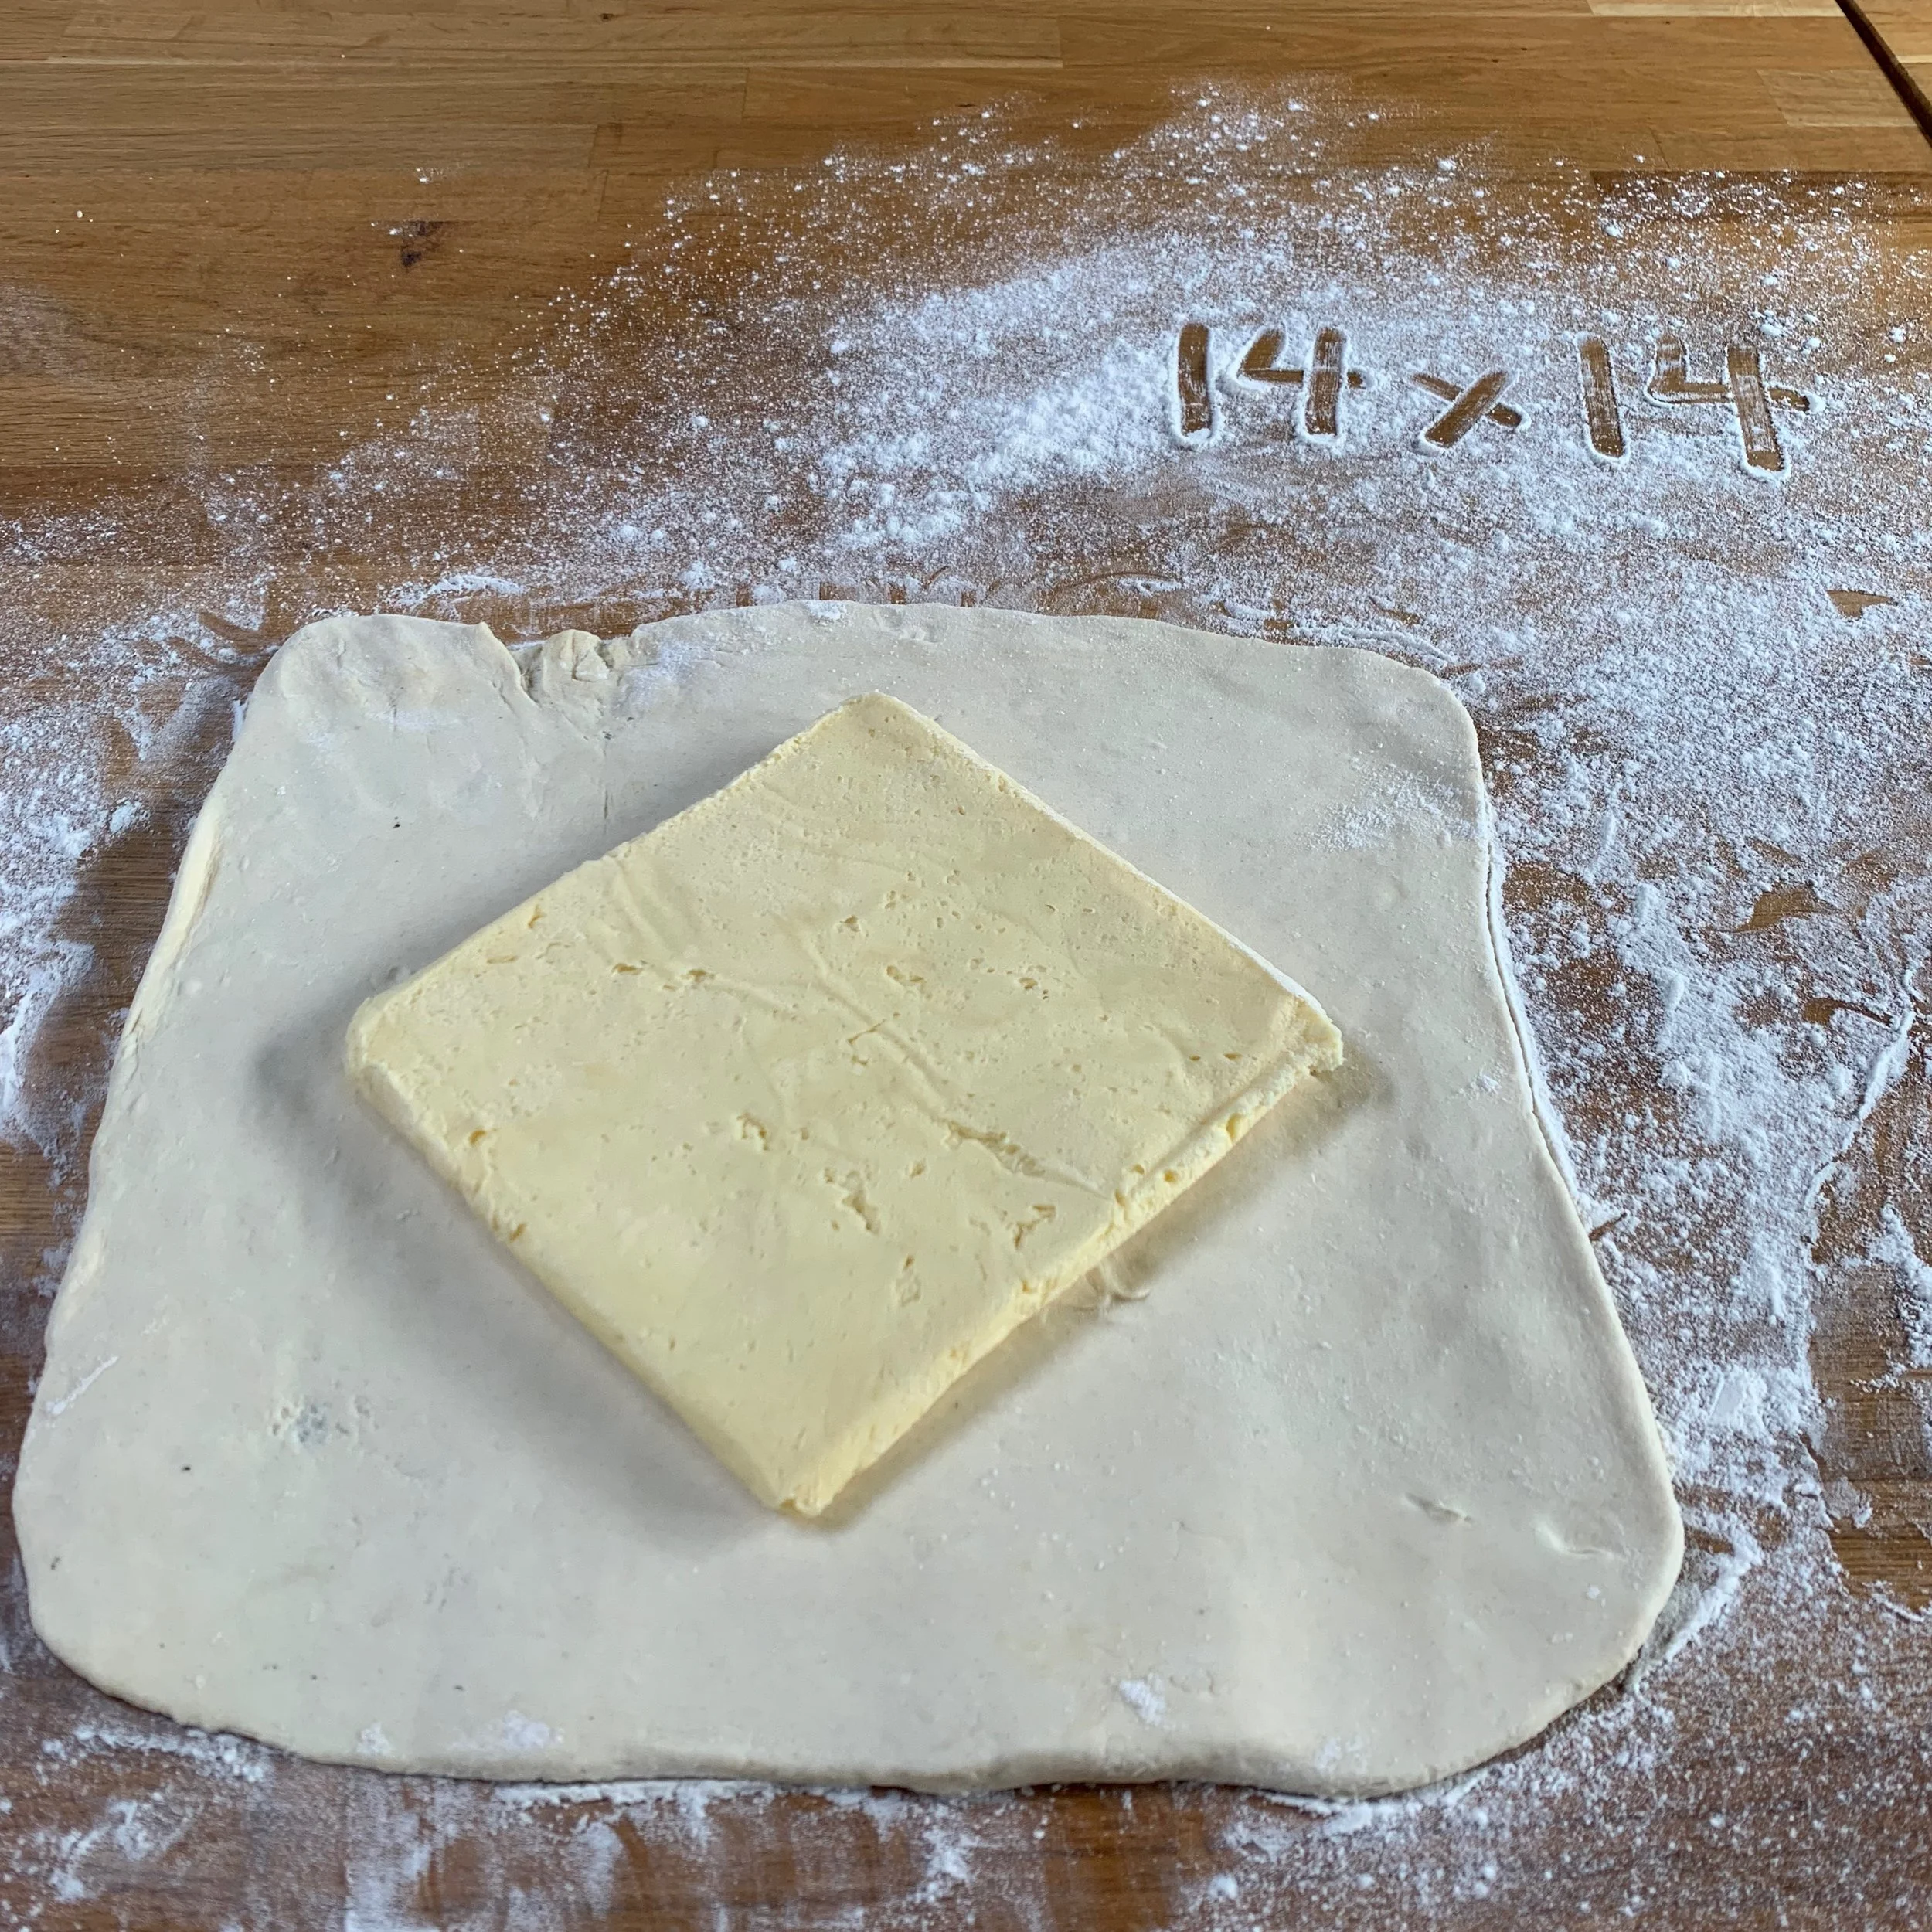
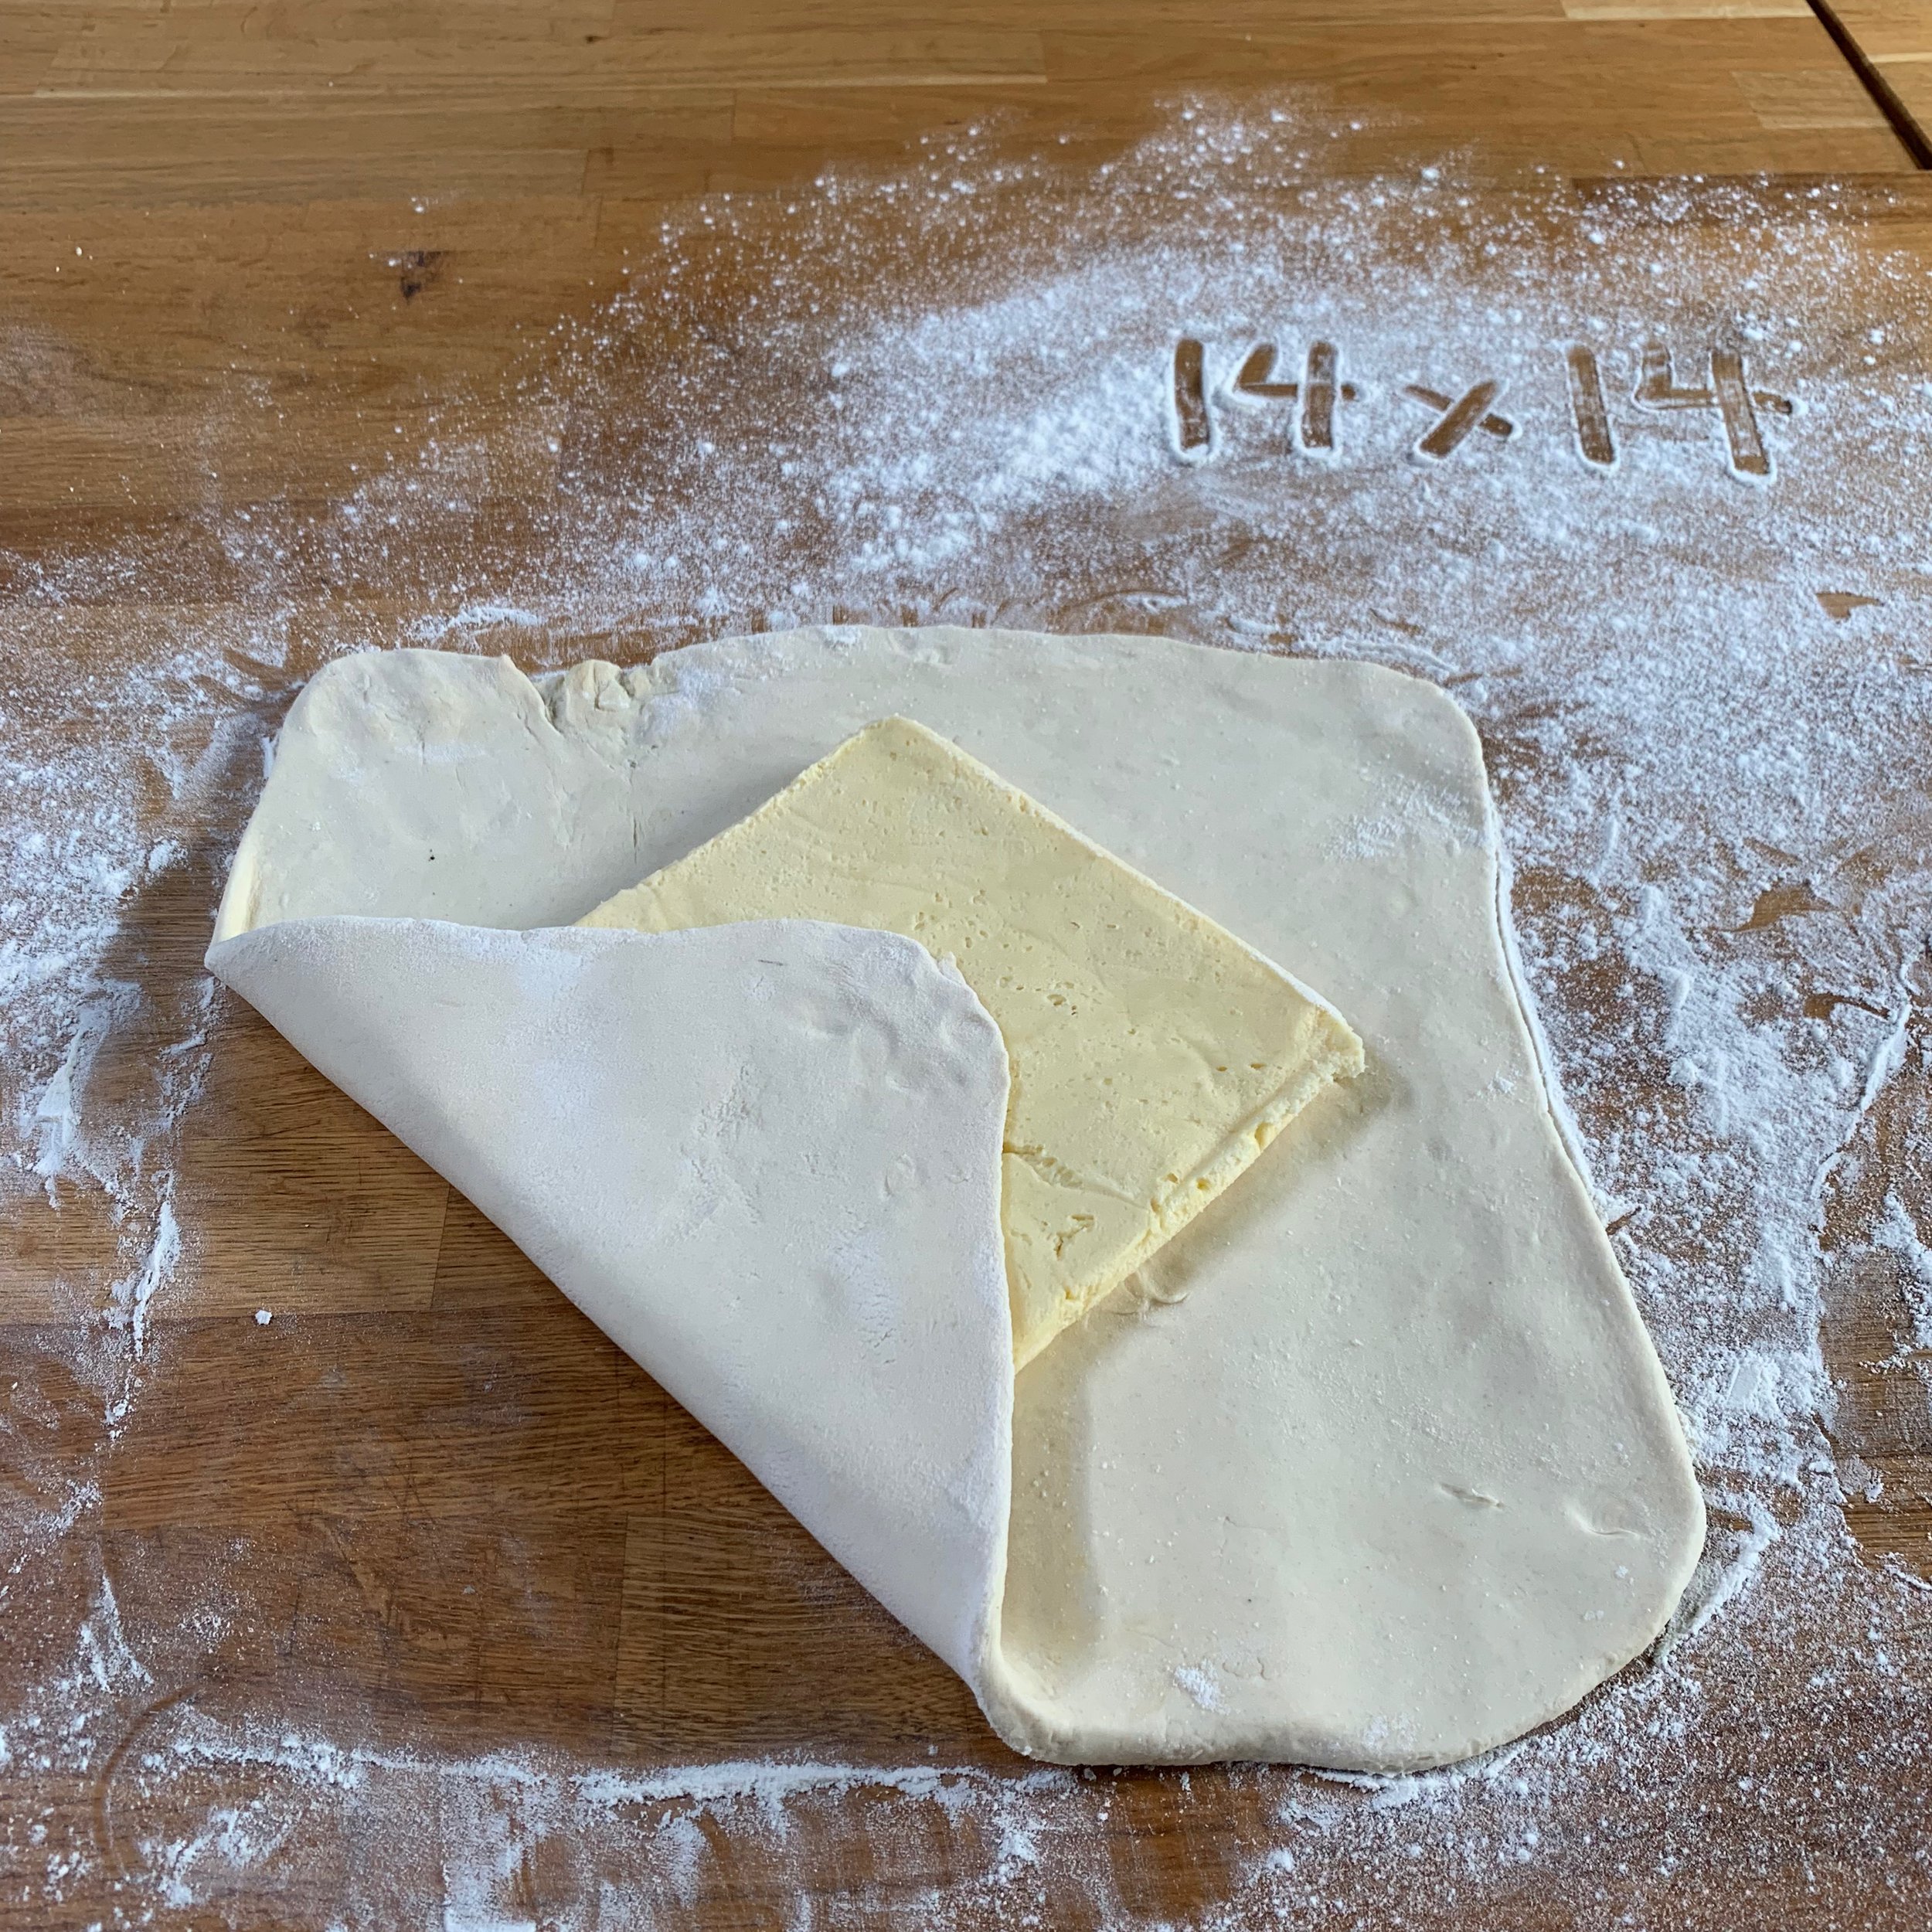
Lightly flour work surface. Take détrempe and butter block out of fridge. Unwrap détrempe and place on lightly floured surface. Roll to a square 14” x 14” (measuring the square and marking with a line in the flour is helpful). Once dough is the correct size, place butter pack in the center, at an angle so that it looks like a diamond.
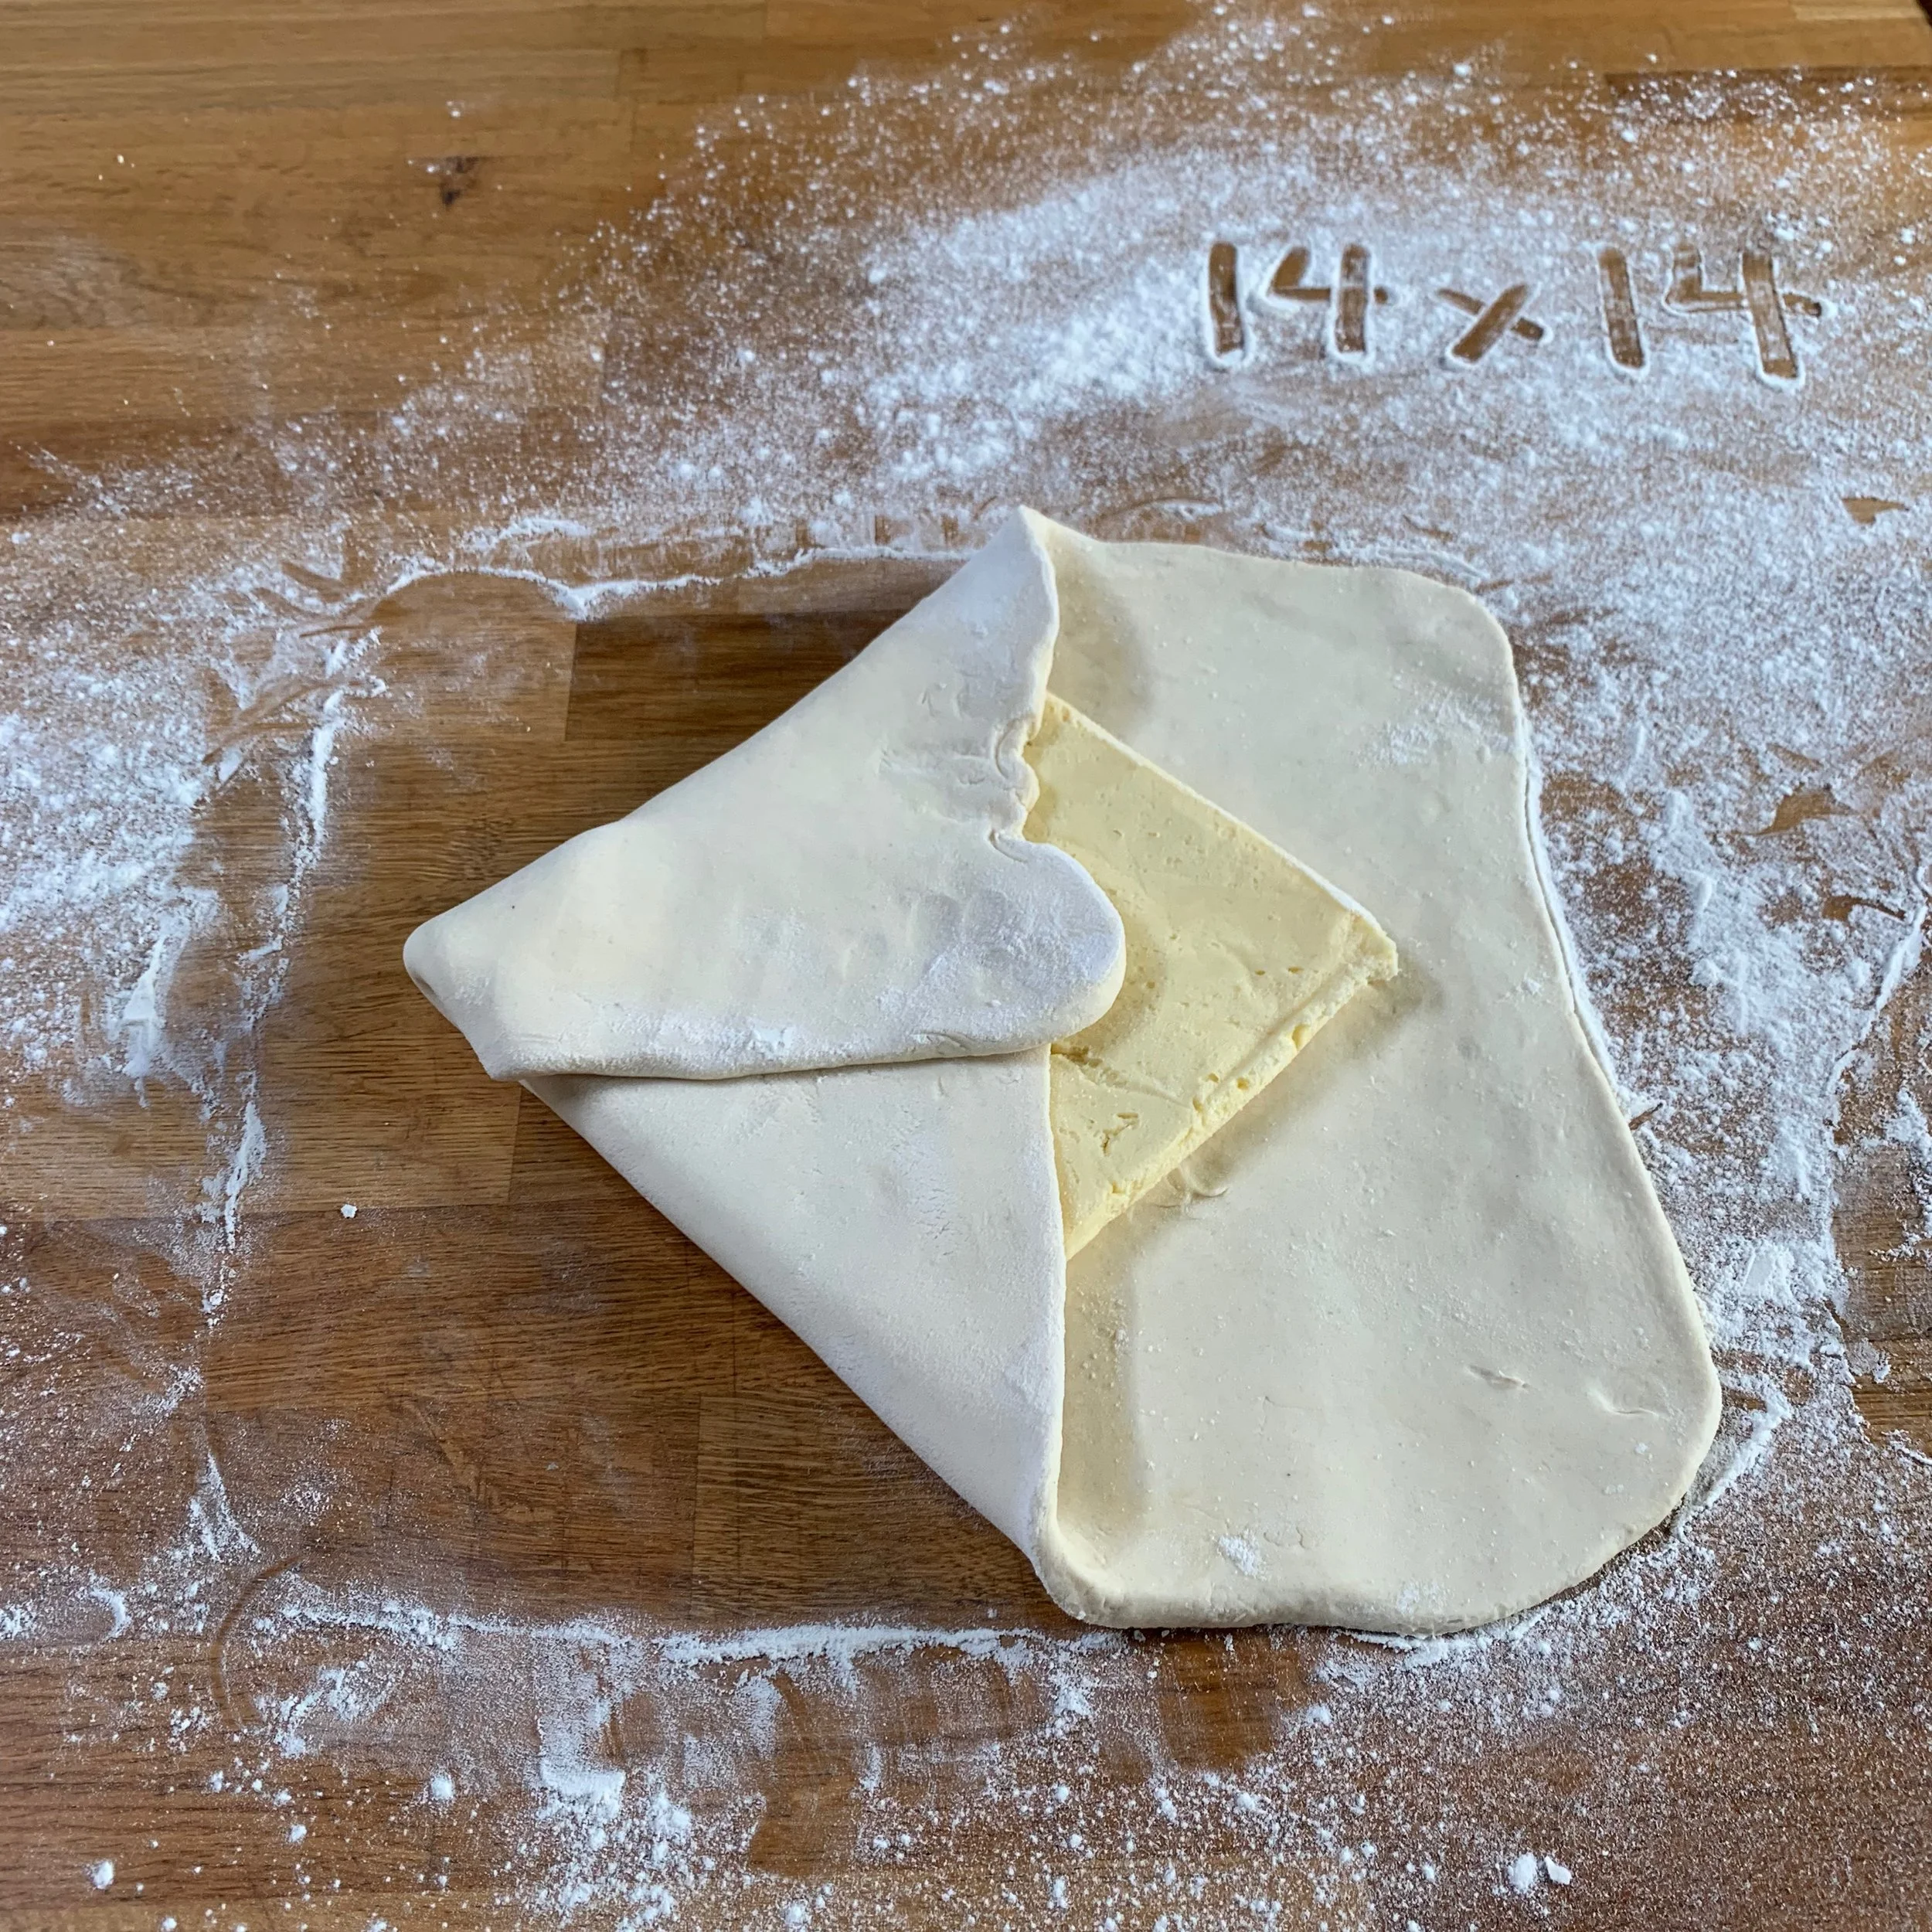
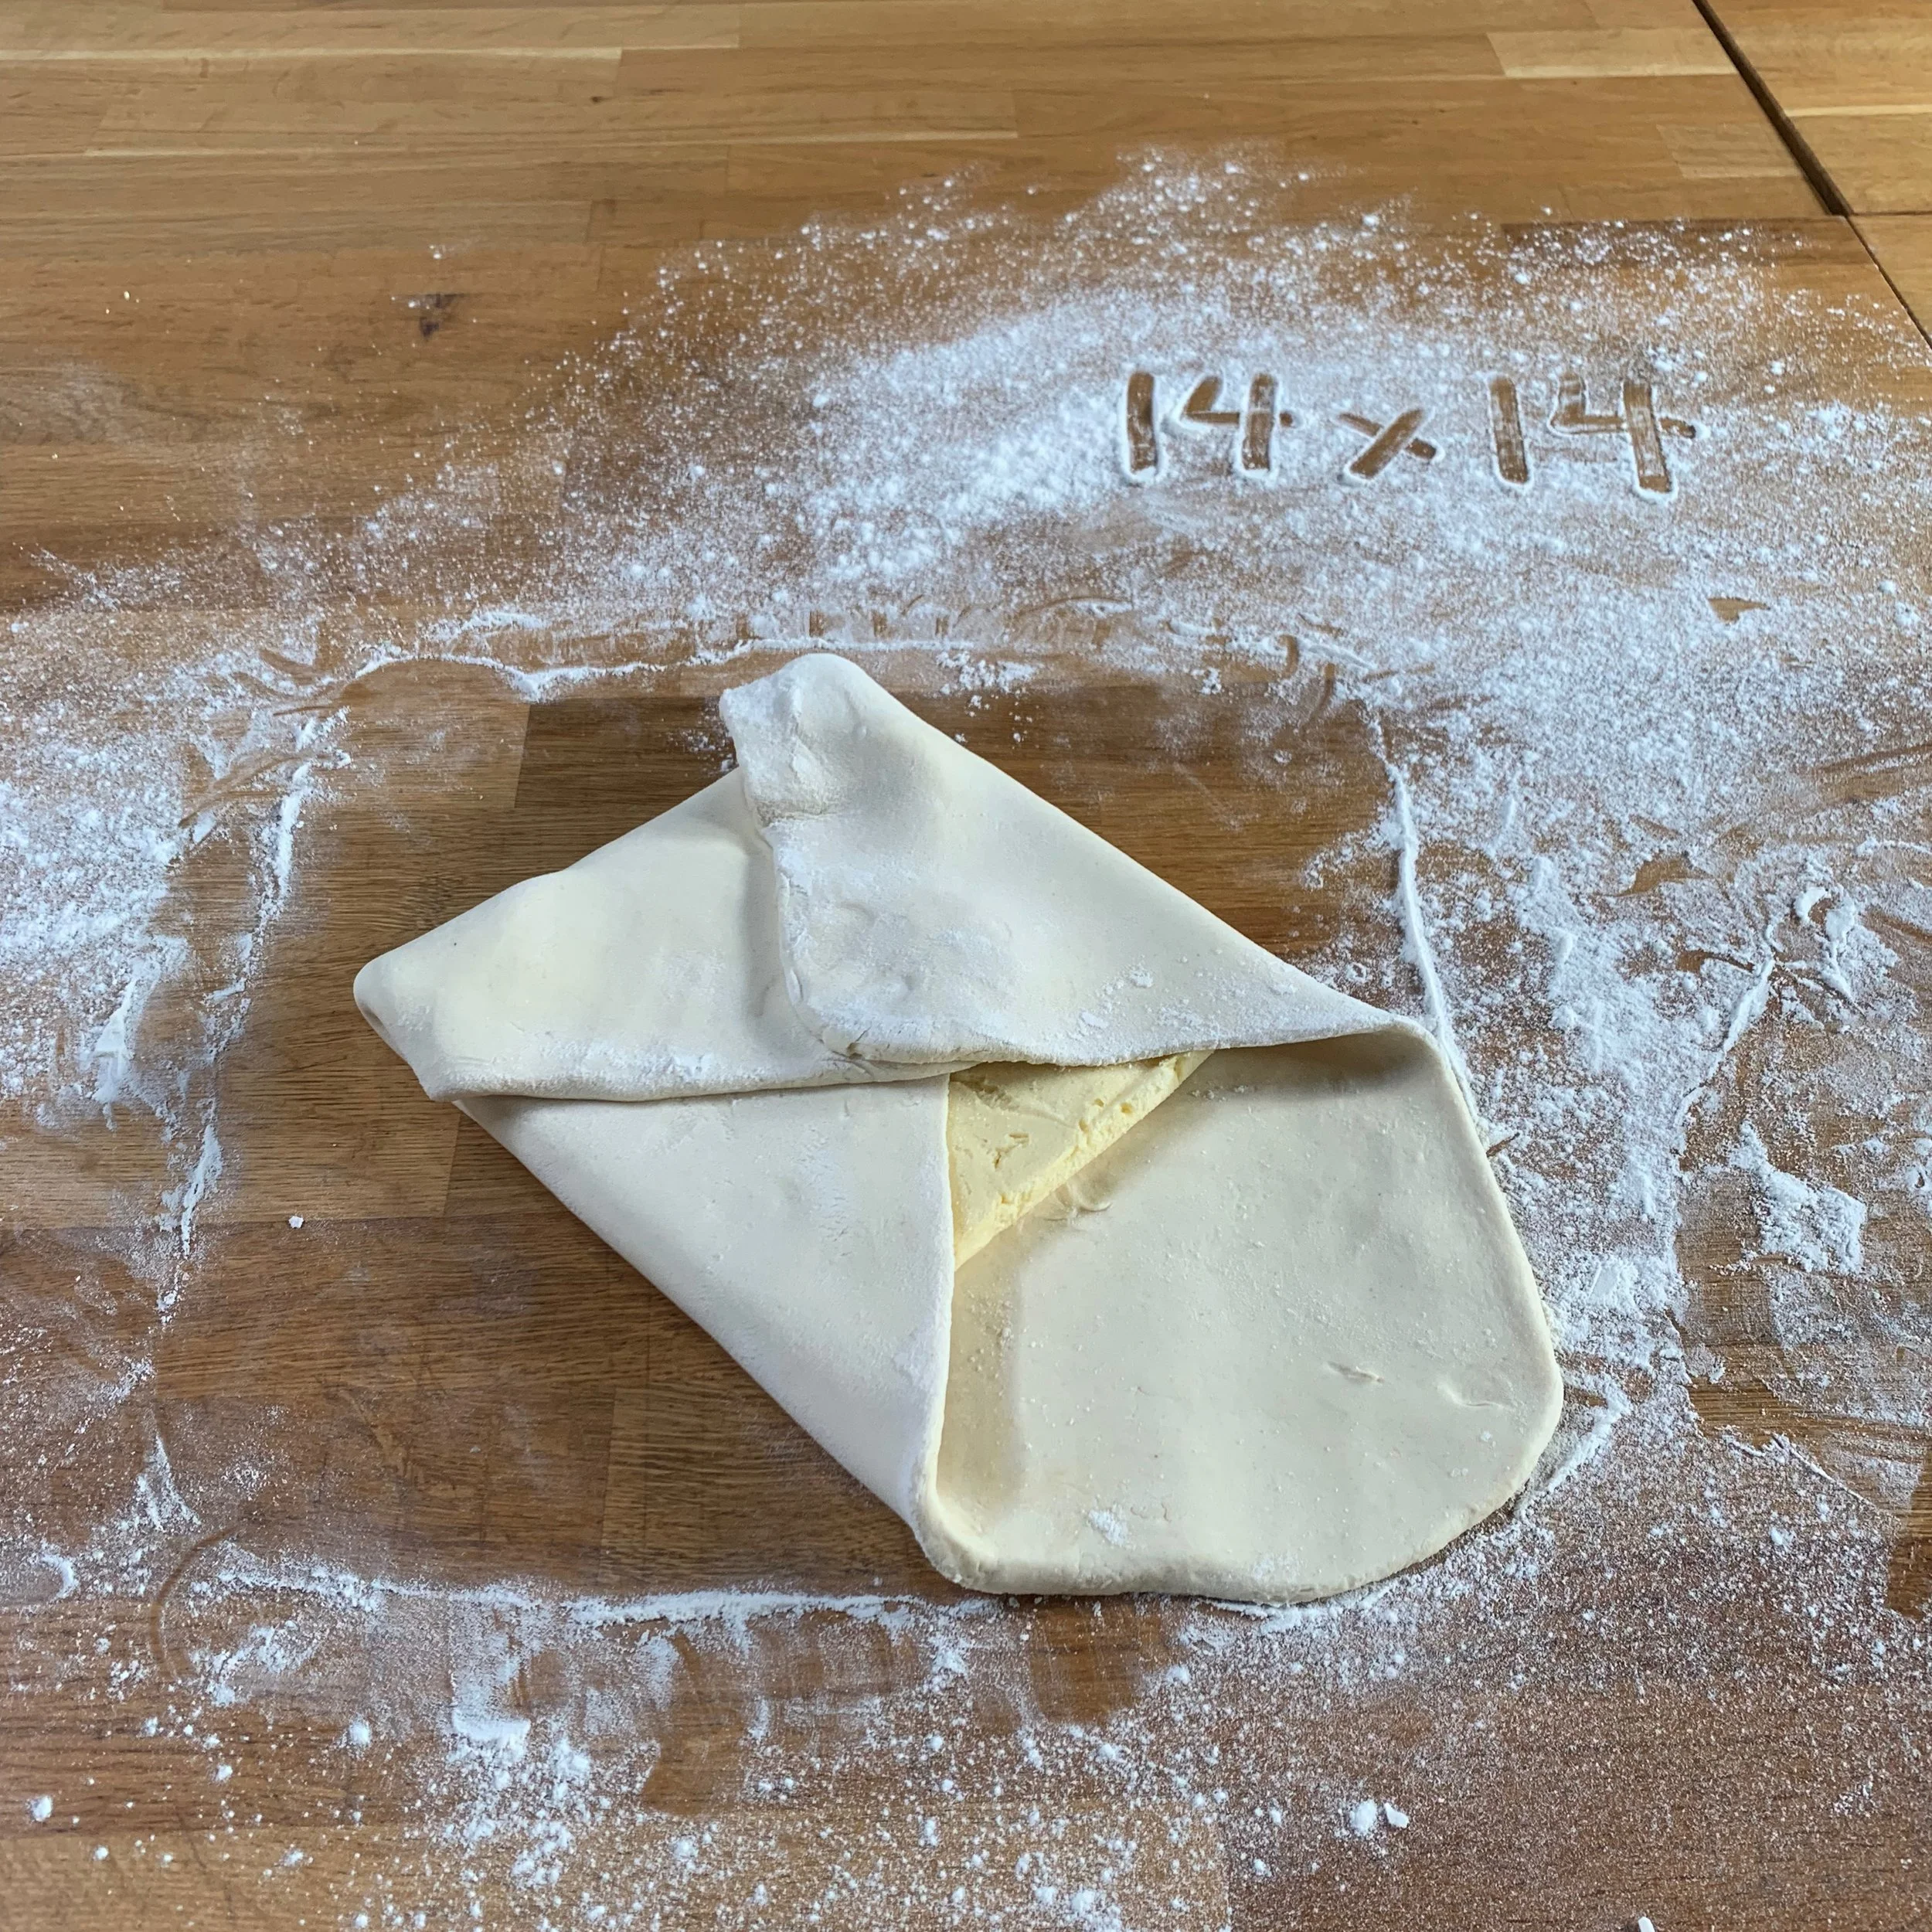
Fold each edge of the dough over the butter, working clockwise so that each corner slightly overlaps the previous corner in the middle (think pinwheel shape).
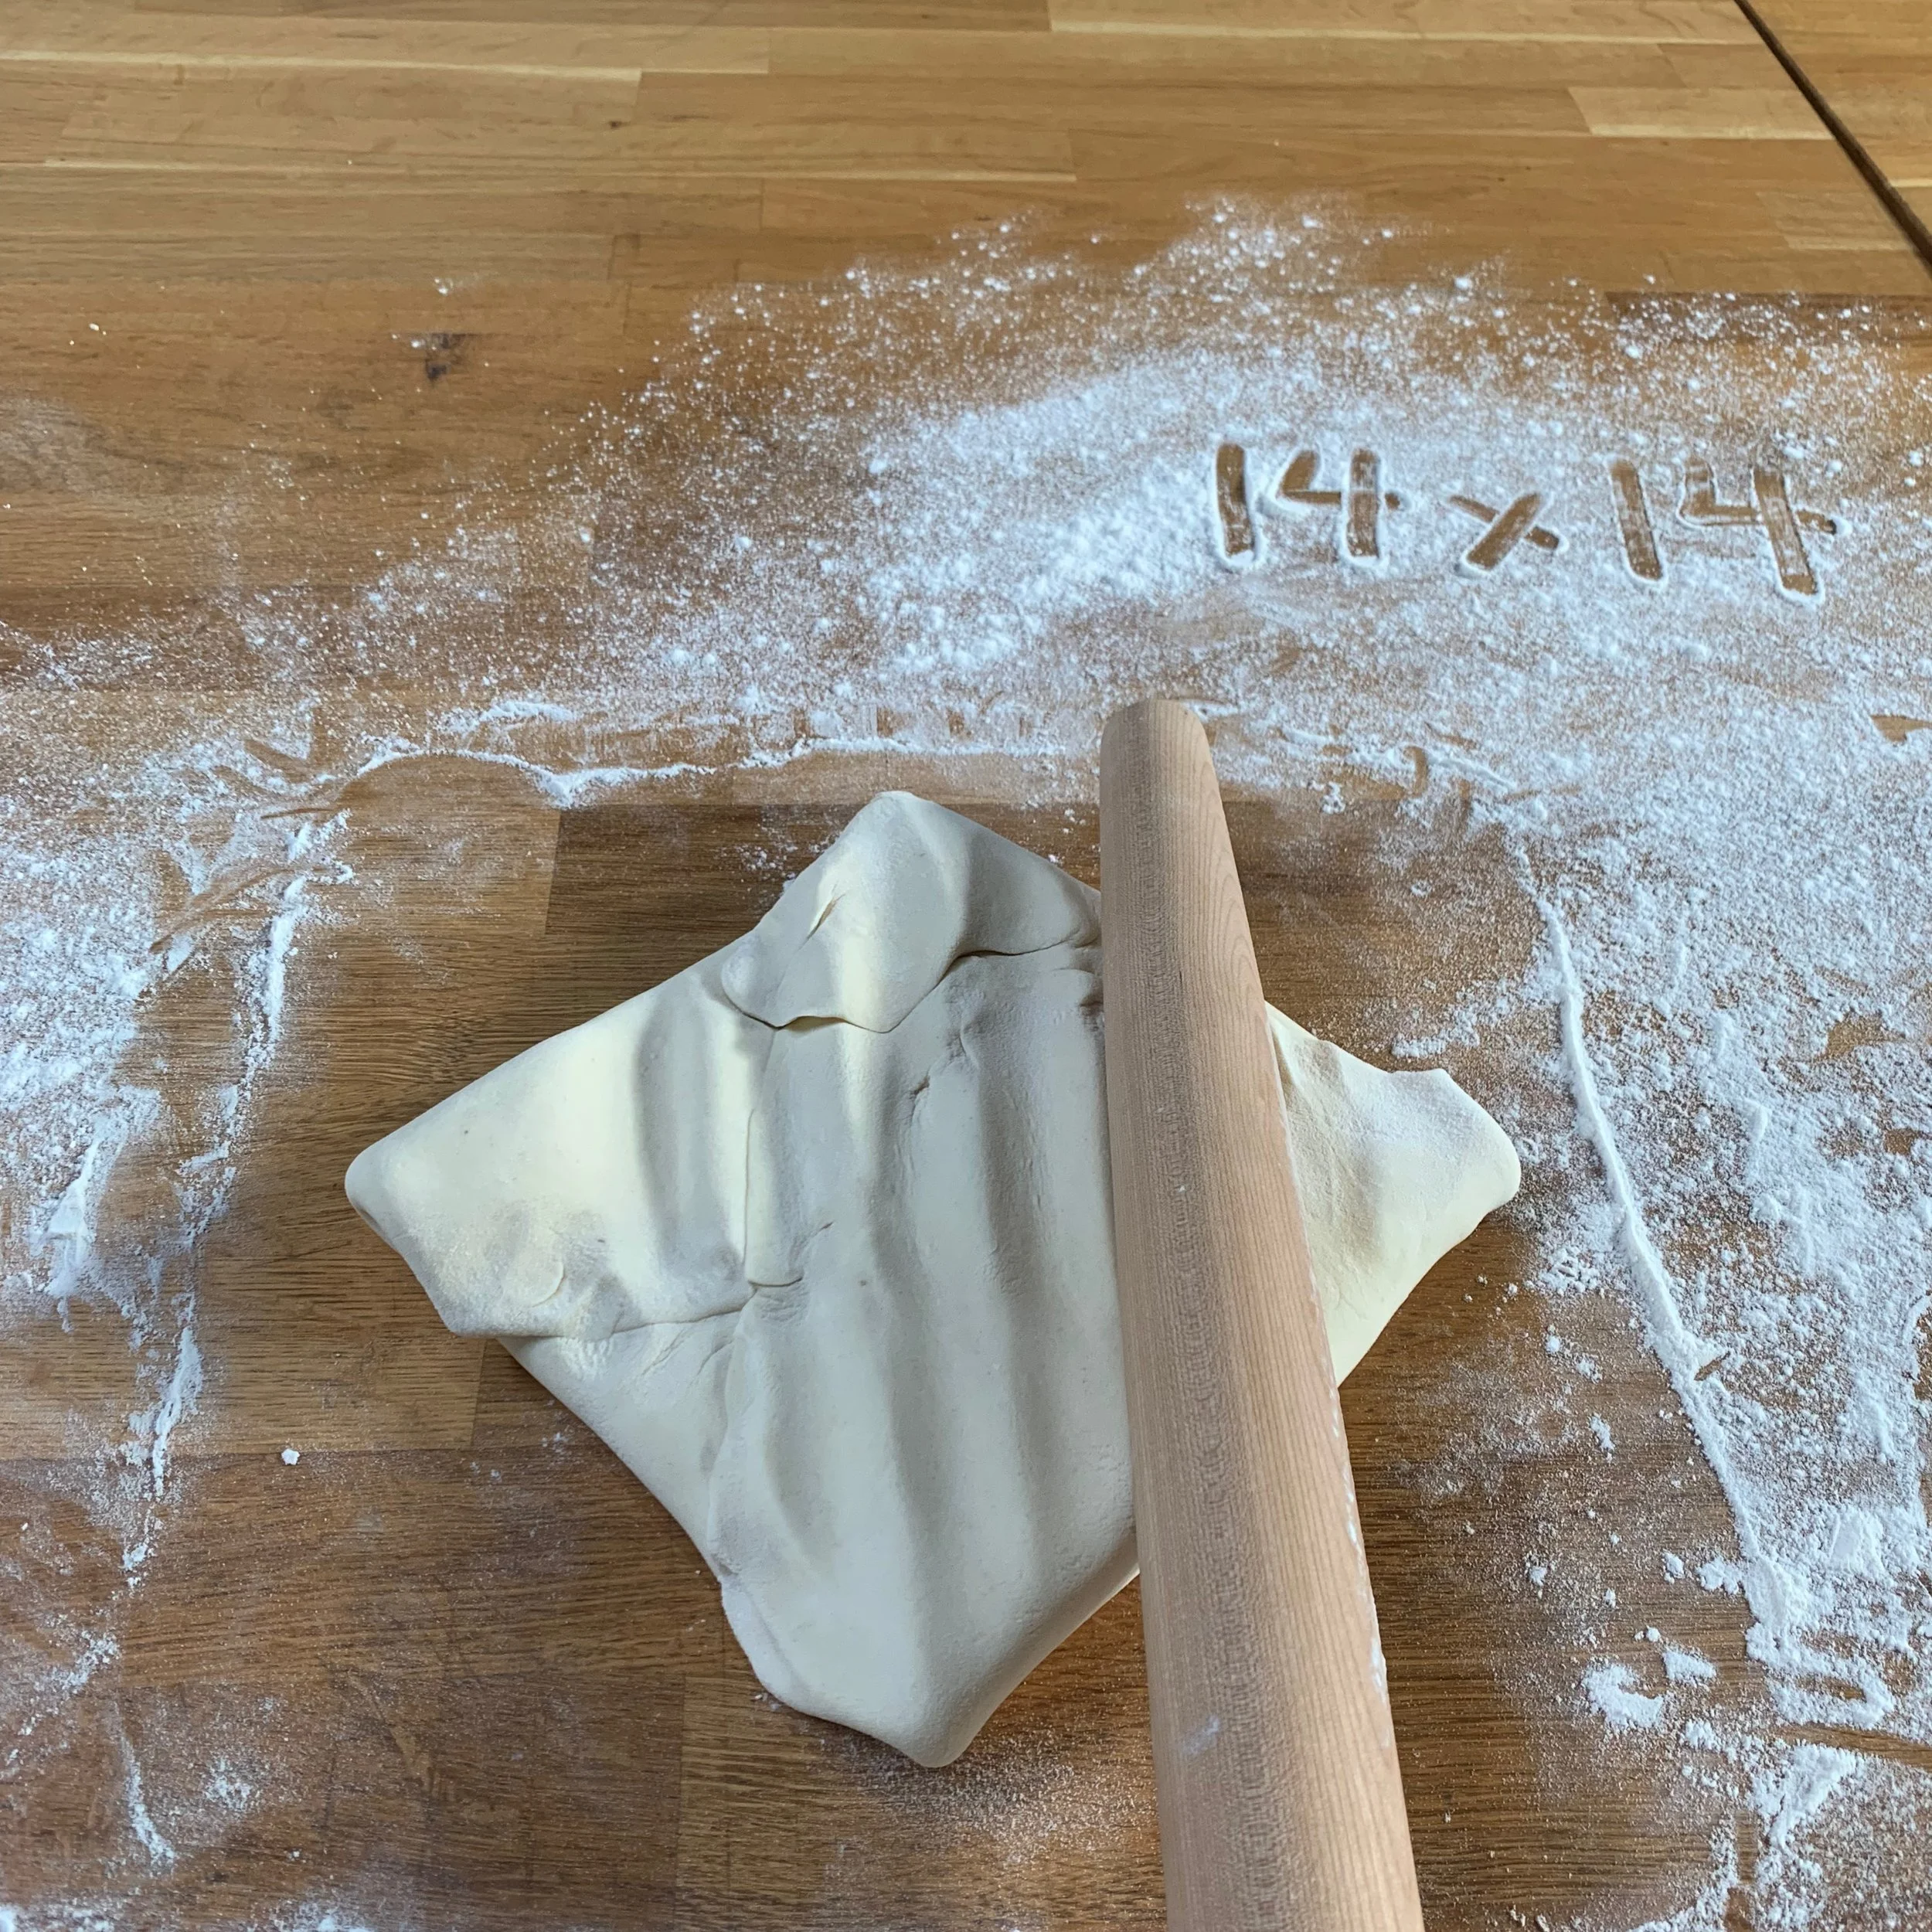
Once dough is completely covering the butter pack, use your rolling pin to beat down dough (gently! Don’t rip the dough!) from one side to the next. This will make sure the butter is evenly spread out.
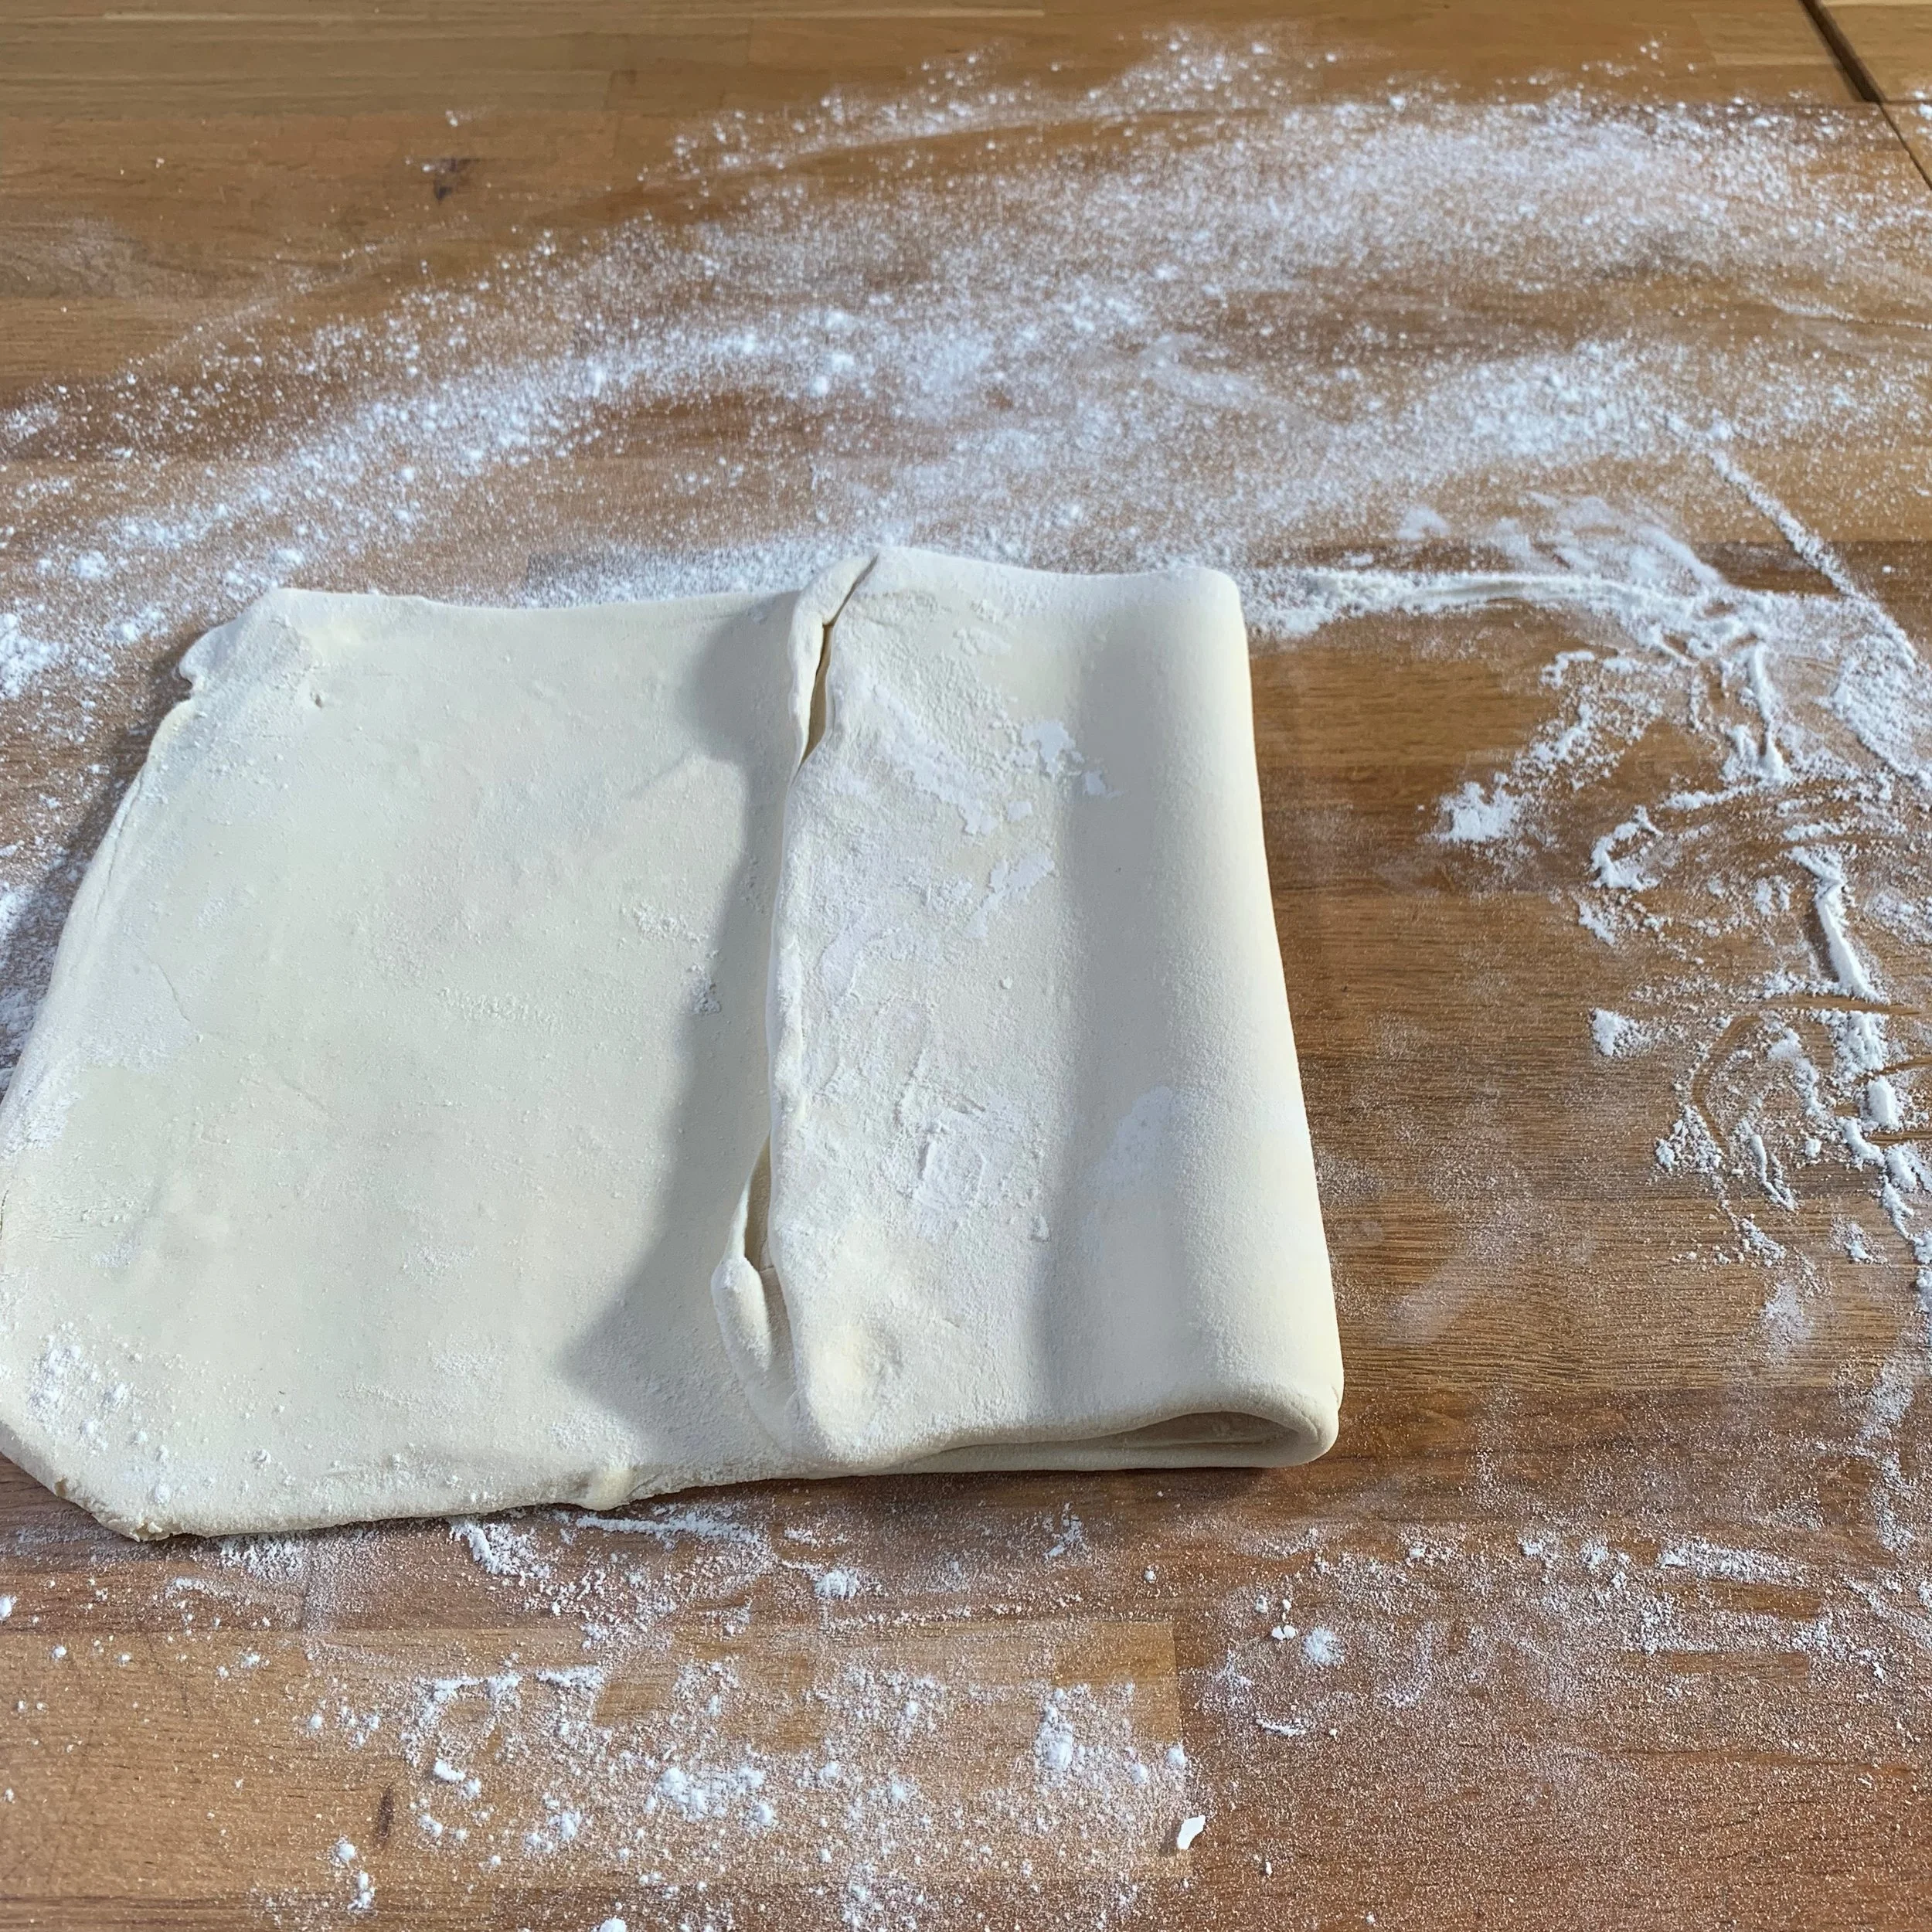
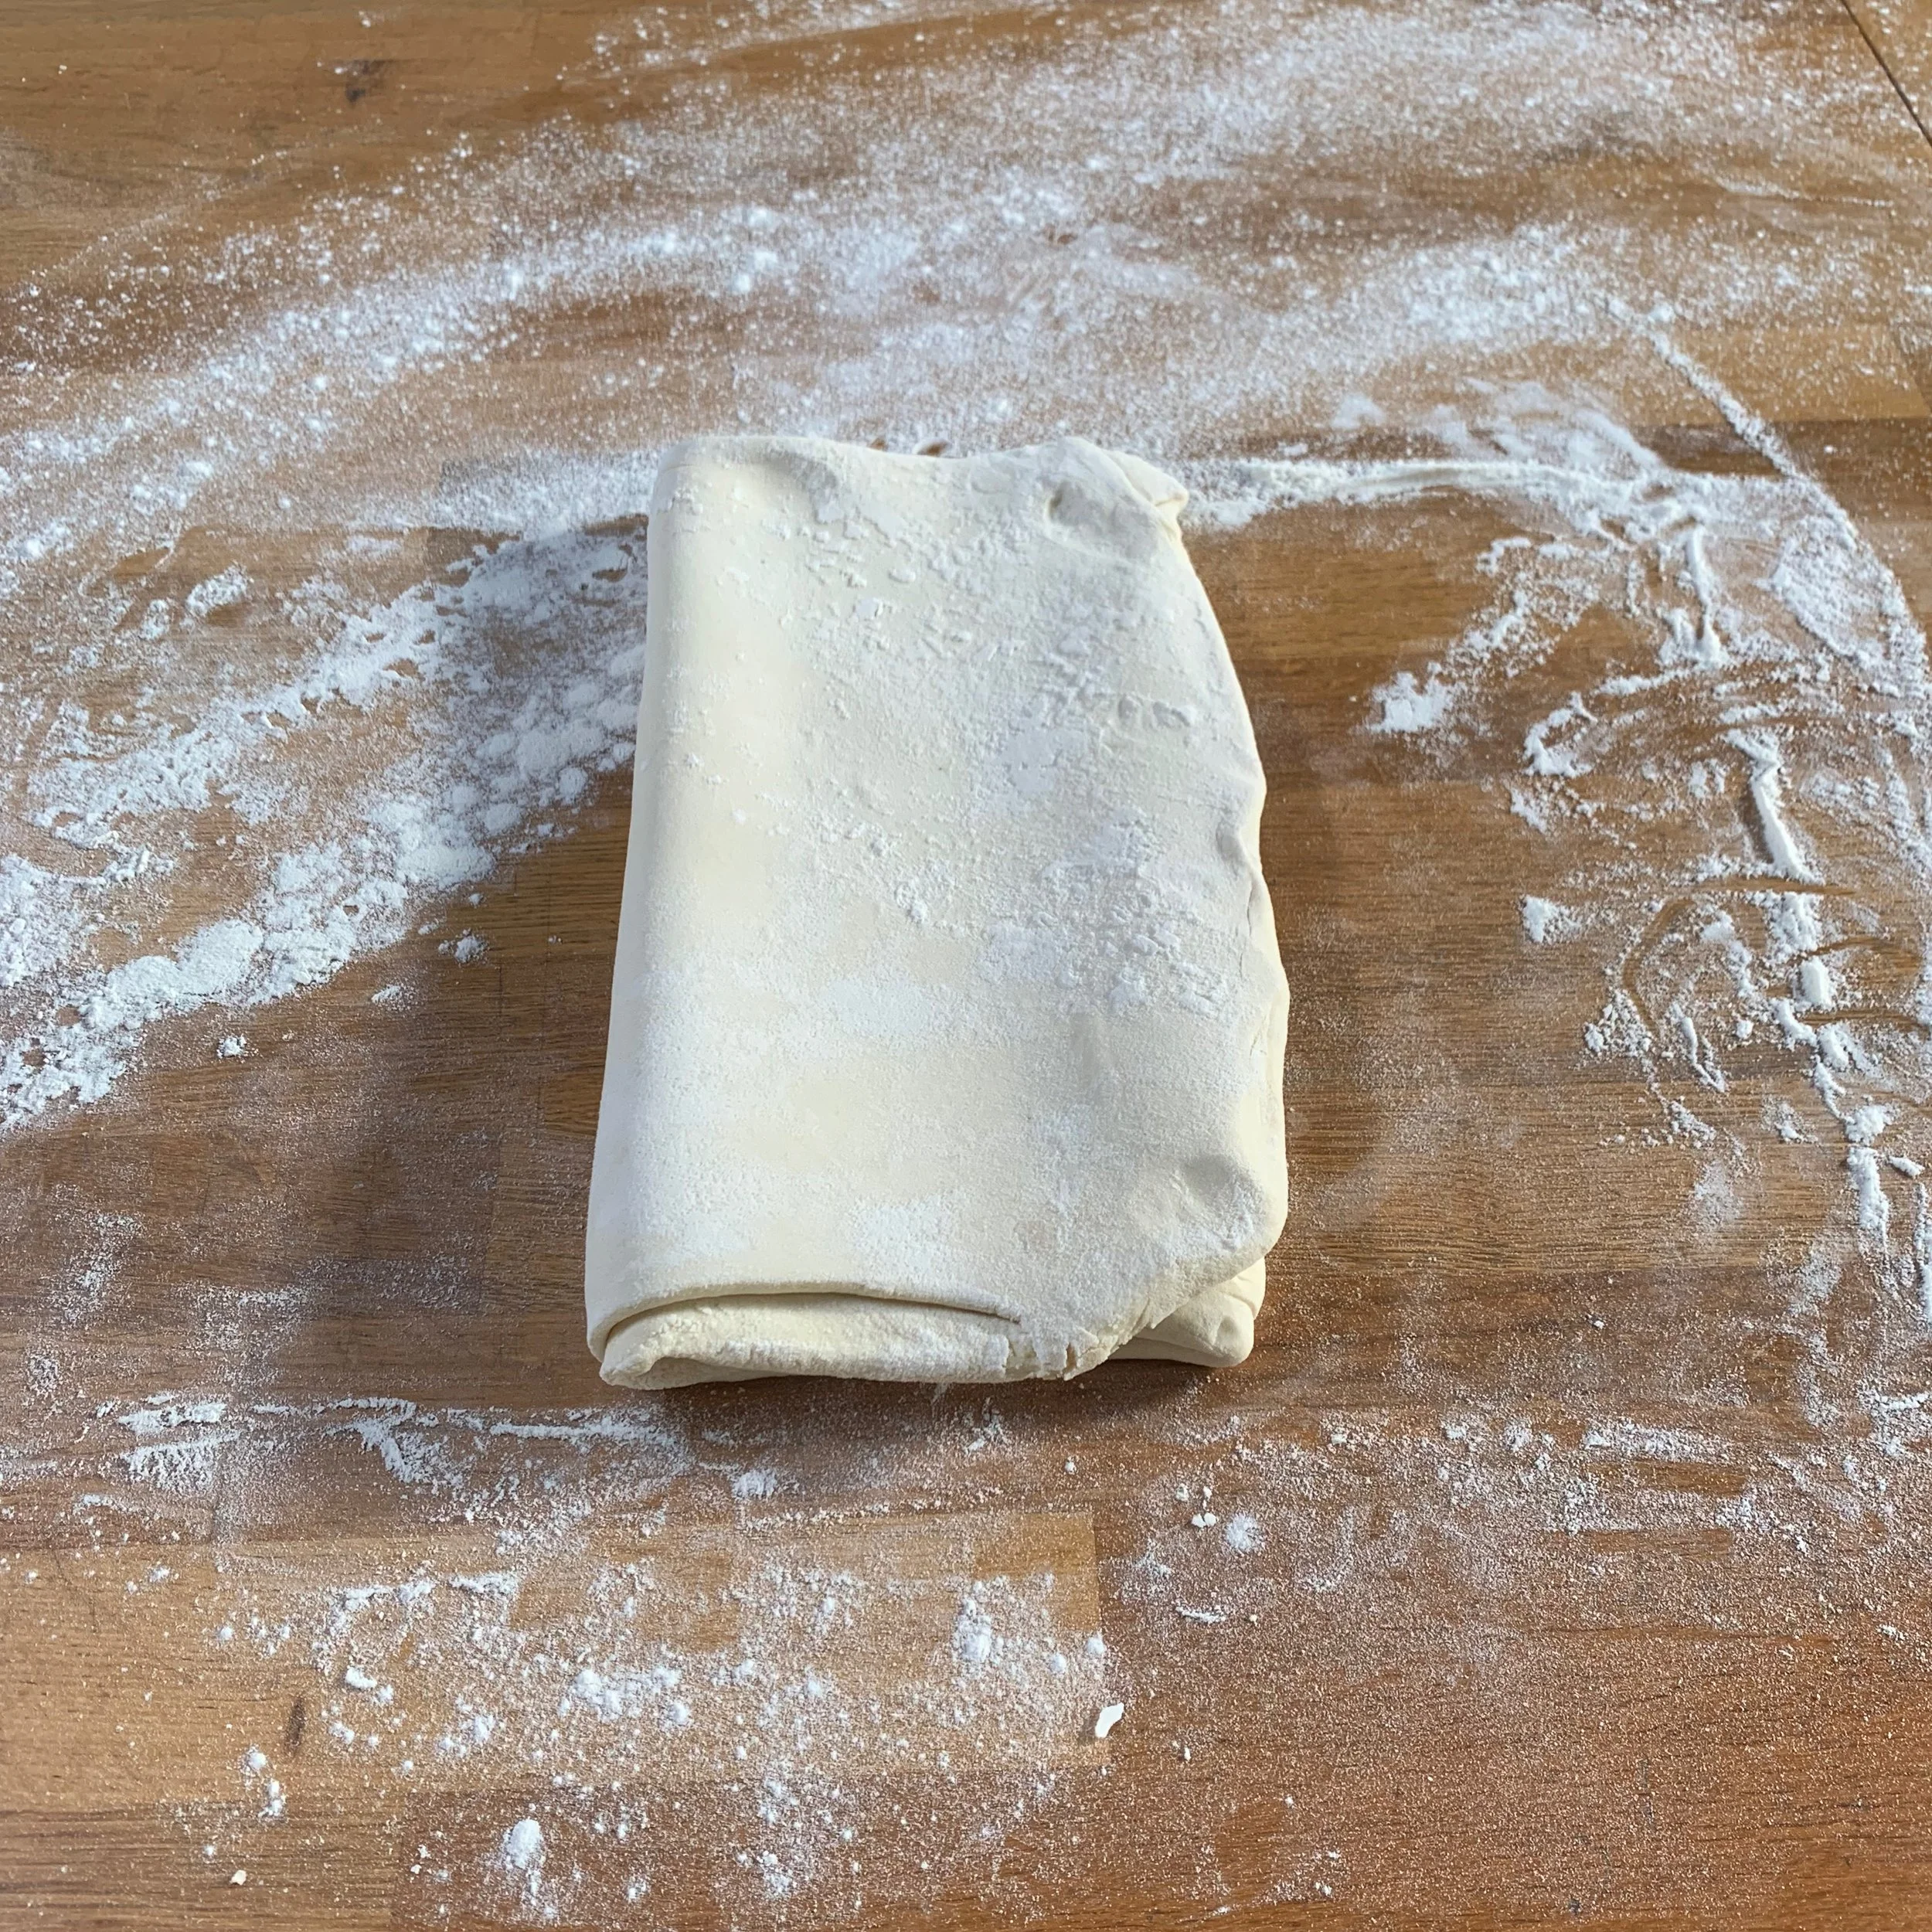
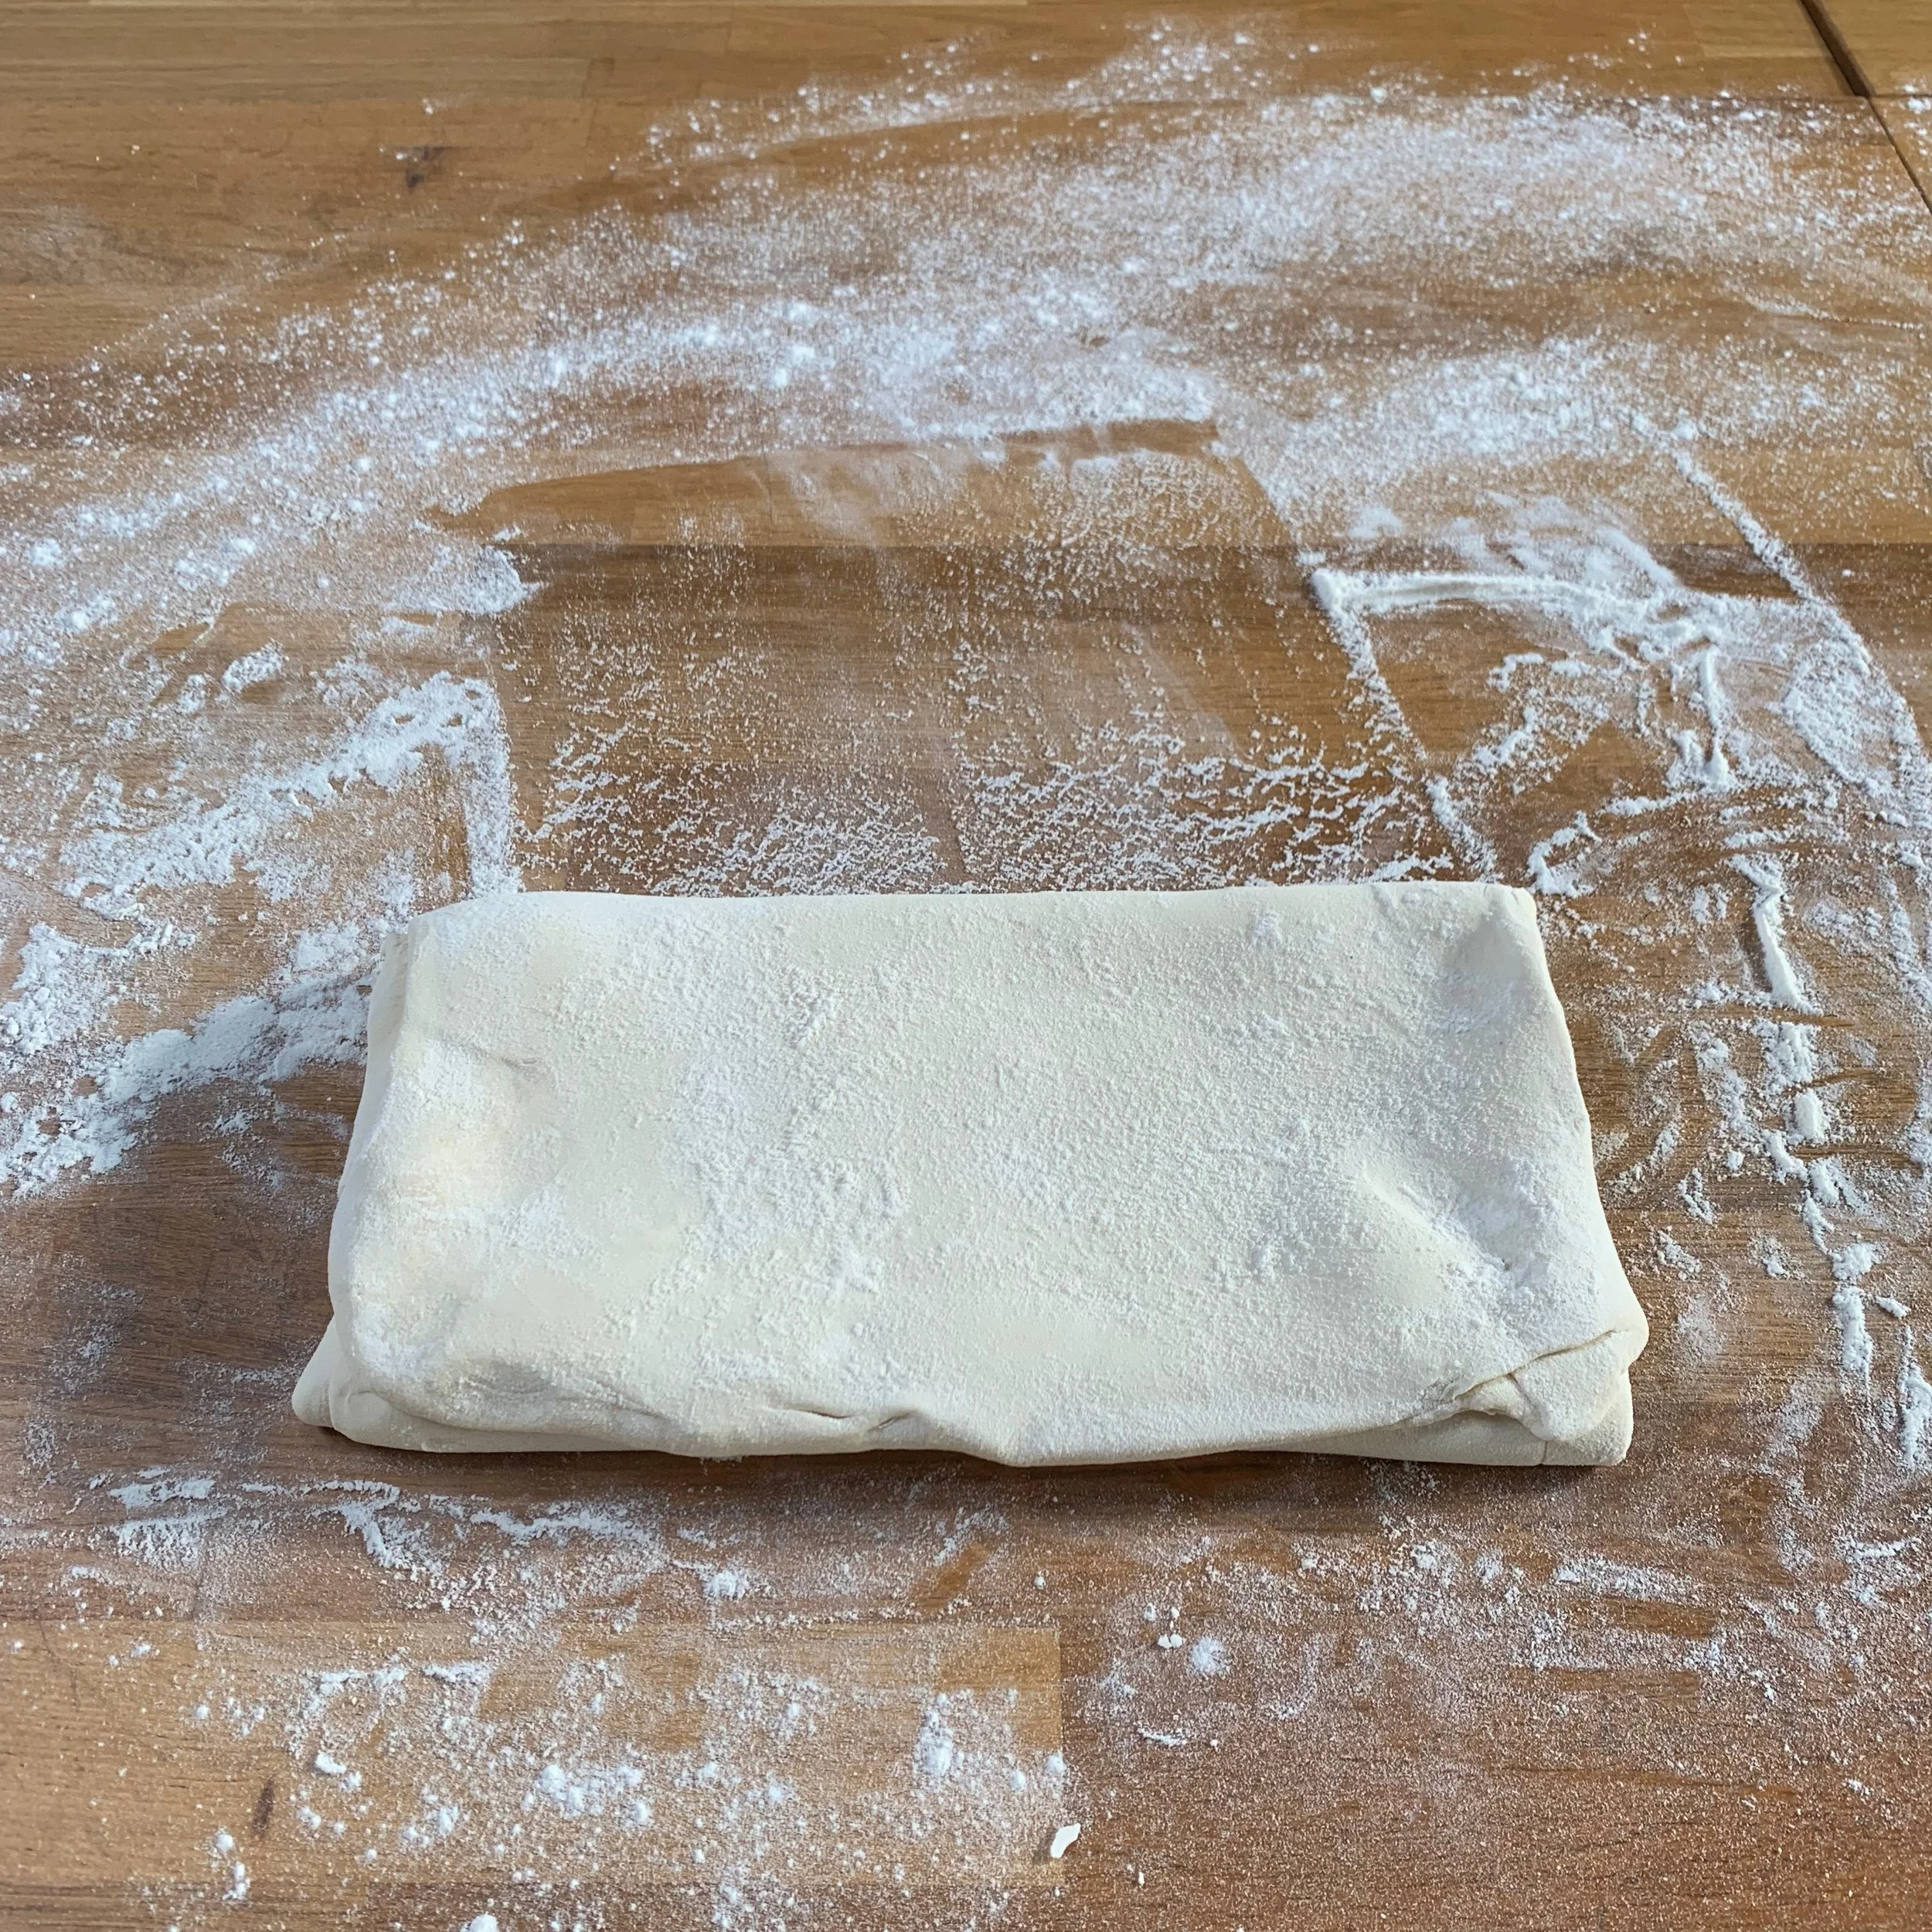
Roll the dough to a large rectangle, approximately 10” x 20”. Mark the dough into thirds by gently pressing your finger into dough. Fold the dough like a letter, bringing the left side in to cover the middle third, use pastry brush to brush off excess flour, then cover with the right side. Wrap dough in plastic wrap and place in fridge for 30 min.
Take dough out of fridge, unwrap and place in opposite direction on your work surface as you finished folding it (ie rotate dough 90 degrees so that the long edge is facing you).Roll into rectangle again, approximately 10” x 20”. Fold like a letter again, rotate and roll and fold one more time (total of 2 rolling and folds). Wrap and chill dough for 30 min.
Repeat rolling, folding and turning 2 more times for a grand total of 5 turns. You can now wrap the dough and chill or freeze for later use. If you want to use right away, you must chill the finished dough for at least an hour (preferably 8 hours/overnight) before rolling again.
NOTES
If the room is quite warm, or your dough just seems to be warming up too quickly after each turn, you can chill the dough after each turn. Another option is to use ice packs to chill your counter before rolling the dough.
If you get a “butter break through”, lightly dust with flour and that should keep the butter contained when it is baked.
Use pastry brush throughout rolling and turning process to remove any excess flour.
Depending on final use of puff pastry, you can portion dough once it is done into 2 or 3 pieces, wrap and save for future use.
If you want to make a bigger batch, you can double this recipe and it will still fit in your stand mixer, but it will be quite full.
Dough can be made without stand mixer. Use pastry blender, two butter knives, or your hands to “cut in” butter to détrempe before adding water, then mix in with your hands and knead on counter top until final consistency is reached. Be more frugal with the water, as kneading very sticky dough is messy.


Bread Baking Recipes and Tips

RECIPES
Creating your own sourdough starter
Basic Sourdough (see below)
HELPFUL VIDEOS
How to videos from Ken Forkish
FAVORITE BREAD BOOKS
Flour Salt Water Yeast by Ken Forkish
Tartine Bread by Chad Robertson
The Bread Baker's Apprentice by Peter Reinhart (this might be out of print, but his book Peter Reinhart’s
Artisan Breads Everyday is likely a great choice too!)
LOCAL FLOUR SOURCES
Helvetia Farm Market (they carry local wheat that they grind into flour to order!)
MORE RECIPES TO USE UP YOUR EXCESS SOURDOUGH STARTER!
Sourdough Cast Iron Pancakes, from New York Times
BASIC SOURDOUGH RECIPE
Ingredients
150 g mature sourdough starter
300 g water (room temp)
450 g flour (bread flour is preferred, but All Purpose will work too)
9 g salt
The ratio here is 1x starter, 2x water, 3x flour. Salt is 2% of flour weight. You can adjust depending on how large a loaf you’d like to bake, and how much starter you have on hand.
Directions
1. Weigh out 150g of starter into large bowl or plastic cambro with lid (feed remaining and save for another batch).
2. Mix in 300g water until it looks like a murky liquid with no lumps.
3. Add 450g flour, using your hands or a rubber spatula. It will look shaggy, and not very “dough like”. That’s ok.
4. Let sit for 20 min. This step is called autolyse, and gives the flour a chance to become fully hydrated. It also gives the starter a head start on doing its work before the salt is added.
5. After 20 min, mix in 9g salt (mix with 1-2 T of water to ease mixing). Fold/pinch dough a bunch (this video shows folding technique). Let sit in container with lid for 30 min.
6. Repeat folding process 2-3 more times, letting dough rest for 30 minutes in between.
7. Shape into round, proof in floured basket or floured tea towel lined bowl. Cover bowl and allow to ferment overnight in fridge.
8. In morning, turn oven to 500 degrees and place Dutch oven inside to heat.
9. Once oven is at temp, carefully place dough in Dutch oven (use parchment to ease in), cover with lid, bake for 20 min.
10. Remove lid, bake another 20 min. Give a bit longer if darker is desired.
11. Allow to cool for at least 30 minutes. Cutting into warm bread will destroy texture and make the crumb gummy. Don’t be tempted!


Handmade Pasta - Durum pasta dough + cacio e pepe

Durum Pasta Dough
Serves 4-6
400g Semola flour (finely ground and sifted durum wheat flour)
180g tepid water
1. Combine the flour and water in a bowl or on a wooden work surface until a cohesive mass has formed.
2. Turn dough out onto a wooden work surface and knead until dough is smooth and elastic and springs back to the touch, about 10 minutes.
3. Cover the dough and let rest for at least 30 min.
4. Roll into logs and shape as desired.
Cacio e Pepe
Serves 4
1lb pasta (long shapes are best)
½ cup pecorino Romano, grated
40 turns black pepper
Bring a large pot of water to a rapid boil.
Salt the water generously and boil the pasta until just al dente.
Meanwhile toast pepper in a dry sauté pan over medium heat until fragrant. Remove from the heat while pasta finishes cooking.
Reserve 2-3 cups pasta water and drain pasta.
Return sauté pan to the heat and add 1 cup pasta water and bring to a boil. Add the drained pasta and toss to coat until the sauce begins to thicken.
Remove the pan from the heat and add ⅓ of the cheese and another ¼ cup of pasta water. Toss and stir the pasta vigorously to melt the cheese and emulsify the sauce.
Add another ⅓ of the cheese and a bit more pasta water and toss again until creamy.
Serve immediately topped with the remaining cheese and some fresh grinds of pepper.
More info, tips, and sources from Leta can be found on her Instagram account, @pastamaia and on the Pasta Maia website.

Culture Club - February 2020

Preserved Lemon (Lemon Pickle)
Halved Juiced lemons packed in salt to cure for a minimum time of 1 month.
Typically I reserve the juice for something else. The way I like to do it is just by covering with salt and letting sit for a few months. To use them after I typically rinse them with lots of water and clean the white pith off.
Notes:
Preserved lemon or lemon pickle is a condiment that is common in the cuisines of Indian subcontinent and North Africa.
Preserved lemons were most likely introduced to American audiences in the mid-1970s, through Paula Wolfert's James Beard Hall of Fame cookbook
Traditional preparations—Algerian couscous dishes, Indian curries, Tunisian chickpea stews, the Moroccan chicken tagine—they're a worthy addition to a wide spectrum of meals.
In On Food and Cooking, Harold McGee suggests that a solution of 5 to 10% salt is needed to achieve a good North African–style preserved lemon. A proper Indian pickled lemon calls for double that amount, as well as turmeric, fenugreek seeds, and chili powder.
Satsuma Kosho (traditionally Yuzu Kosho)
A paste made from chili peppers, citrus peel peel and salt, which is then allowed to ferment. I used Satsuma mandarins to show that you can use whatever you have available to you.
RATIO: 1 part zest to 2 parts pepper and 10% salt. I have seen people add garlic or ginger to it as well. I prefer just the citrus and pepper.
Notes:
It is usually used as a condiment for hot pot dishes, miso soup, and sashimi.
The most famous types of yuzukoshō come from Kyushu, where it is a local specialty.
I like to think of it as a citrusy, funky sambal paste You can put it on anything, really fun and bright.
Yuzu kosho is at its best when it's cutting through the richness and fat of meat.
It’s a great way to utilize the whole citrus instead of just juicing.
The history of this condiment only goes back about 50 years or so, making it a far more recent introduction to Japanese cuisine than miso paste or soy sauce. It has only just become widely available in supermarkets across Japan.
The name 'kosho', which is typically the word used for black pepper (or peppercorns) in Japanese, is not typically applied to foods made with chili peppers. Rather the Kyushu dialect of Japanese has used the word 'kosho' to refer to chili peppers that other regions call 'togarashi' for centuries, and the name 'yuzu kosho' stuck.
Grapefruit Curd
Ingredients:
1 cup fresh grapefruit juice (from 2 grapefruits), plus 3 tablespoons finely grated Ruby Red grapefruit zest
3 large eggs plus 3 large egg yolks
1/3 cup sugar
Coarse salt
8 tablespoons unsalted butter, cut into small pieces and softened
Directions:
Bring grapefruit juice to a boil in a small saucepan over medium-high heat. Reduce heat and simmer until juice is reduced by half, about 5 minutes. Let cool.
Whisk together eggs, yolks, sugar, grapefruit juice, grapefruit zest, and a pinch of salt in a double boiler or a heatproof bowl set over (not in) a pot of simmering water. Cook, whisking constantly, until thickened, 6 to 7 minutes. Remove from heat, and whisk in butter, a few pieces at a time.
Pour mixture through a fine sieve into a bowl set in a larger bowl filled with ice water, and stir until cool. Cover surface of curd with plastic wrap, and refrigerate until cold, at least 4 hours and up to 2 days.
(adapted from Martha Stewart)
Couscous with Preserved Lemon, Olives and Almonds
Recipe made in class was a loose interpretation of this recipe, found on Food52.
Porridge Pop-Up with Kristen Rasmussen
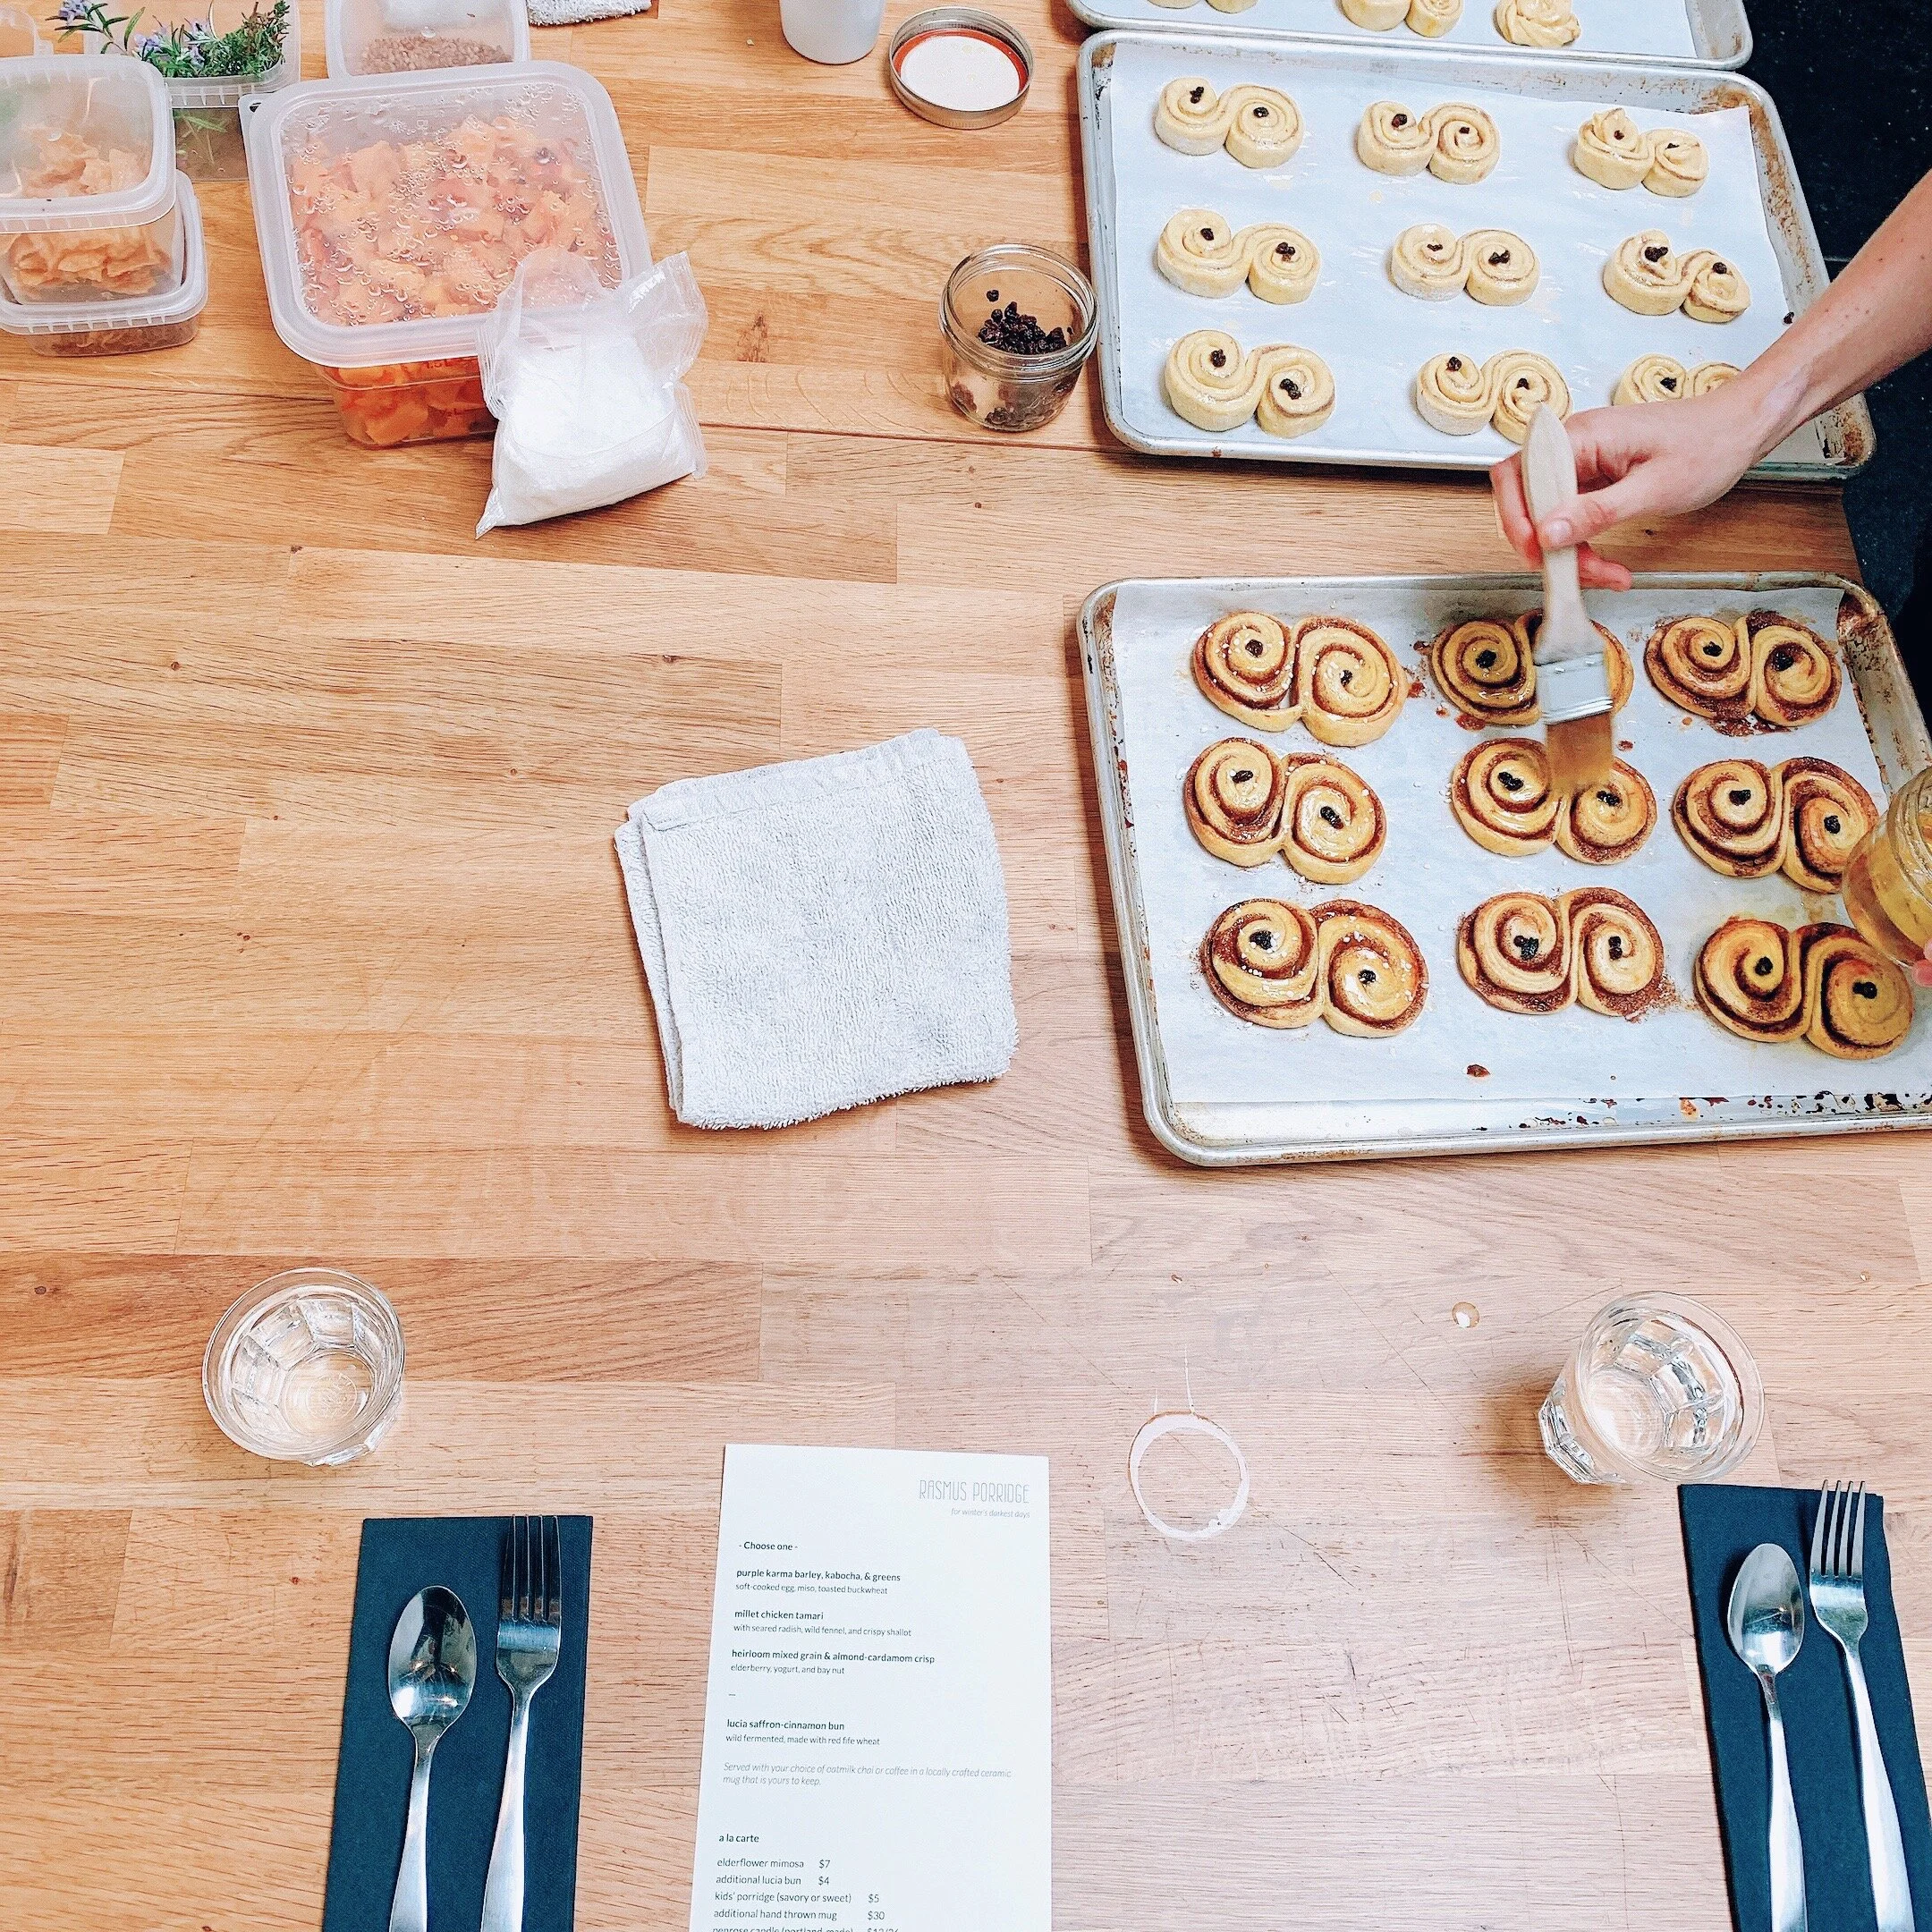

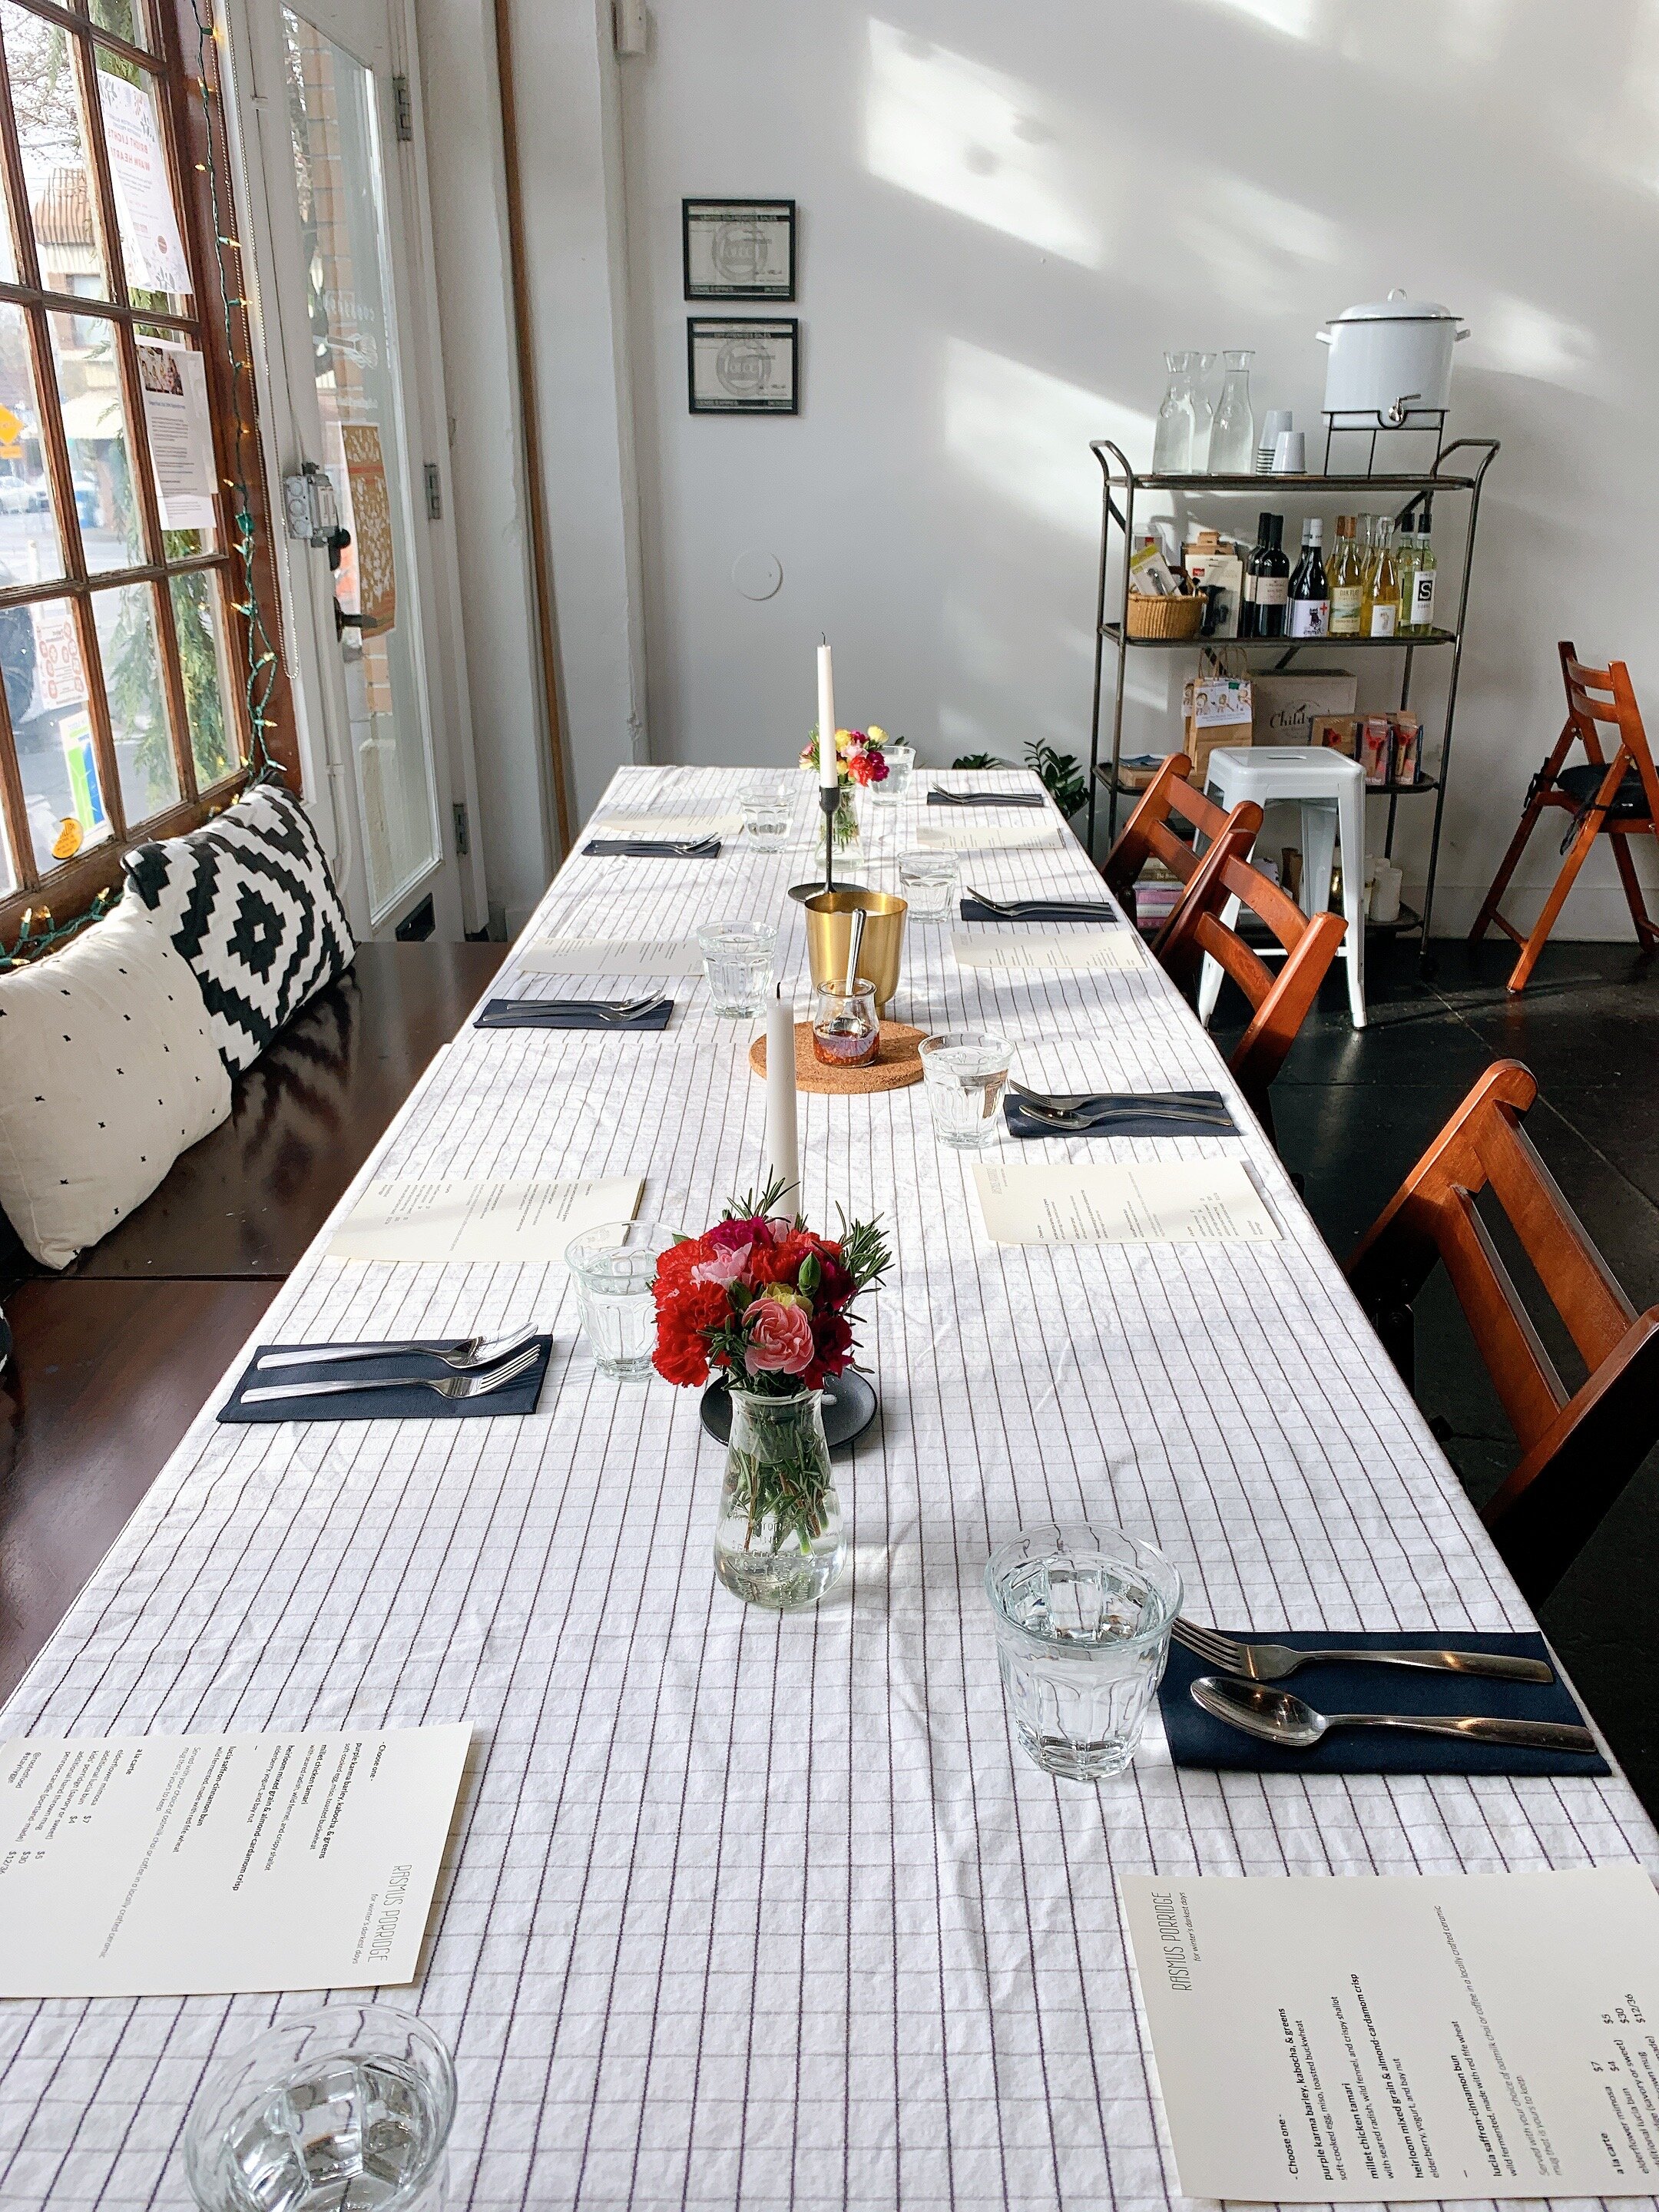


From polenta to congee, pretty much every culture has a porridge. Porridge is both the food of fairy tales and the food of peasants - in the best ways possible. There are so many methods to creating delicious, nourishing porridge. Below you’ll find some of my tips and a few recipes, but remember that porridge is incredibly forgiving and begs experimentation. Enjoy and, as always, stay hygge*!
Tips for getting your porridge on:
Any grain can be “porridged” - think beyond oats. Rice (aka congee), corn (aka polenta), kasha (aka toasted buckwheat), øllebrød (rye bread/beer), and the list goes on. Just cook grains as you normally would (heartier grains like barley take longer, whereas refined/smaller grains like rice are faster), but add more water/broth/other liquid and stir more often. Once you figure out how much water is needed for your ideal porridge, you can add it all at once.
Porridge can be sweet or savory - there’s no rules! It’s a blank slate!
It can be nice to toast your grains before cooking the porridge either in a pan on the stovetop or a cookie tray in the oven (I like to do this for buckwheat and millet especially).
I like to cook many of my porridges overnight in a slow cooker, especially when making larger quantities - I like the texture that results from this process, but it’s all about testing different methods. A pressure cooker works for coarser grains to in a pinch!
If the texture isn’t to your liking, don’t give up! Try adding other ingredients like flavorful fats, blended fruit or winter squash, or broth.
The problem with most porridge you find in the U.S. (aka sad oatmeal) is that there’s no love in it - add some flavor with spices, miso, herbs, butter, cheese, roasted vegetables, etc. and please - I can’t stress this enough - ADD CRUNCHY BITS. Savory ideas - crispy shallots, bacon, toasted hazelnuts/sunflower seeds/etc., furikake, seaweed, chicken skin…Sweet ideas - toasted nuts/seeds yet again, cacao nibs, candied orange peel…
Any leftover porridge can be reheated another time or used in bread baking or made into pancakes (just add egg/water and cook as you would normal pancakes! Savory or sweet - both are great).
Recipes
Remember that these are completely adaptable for what suits your fancy/what you have on hand - feel free to replace ingredients with others, leave things out, or use a different grain.
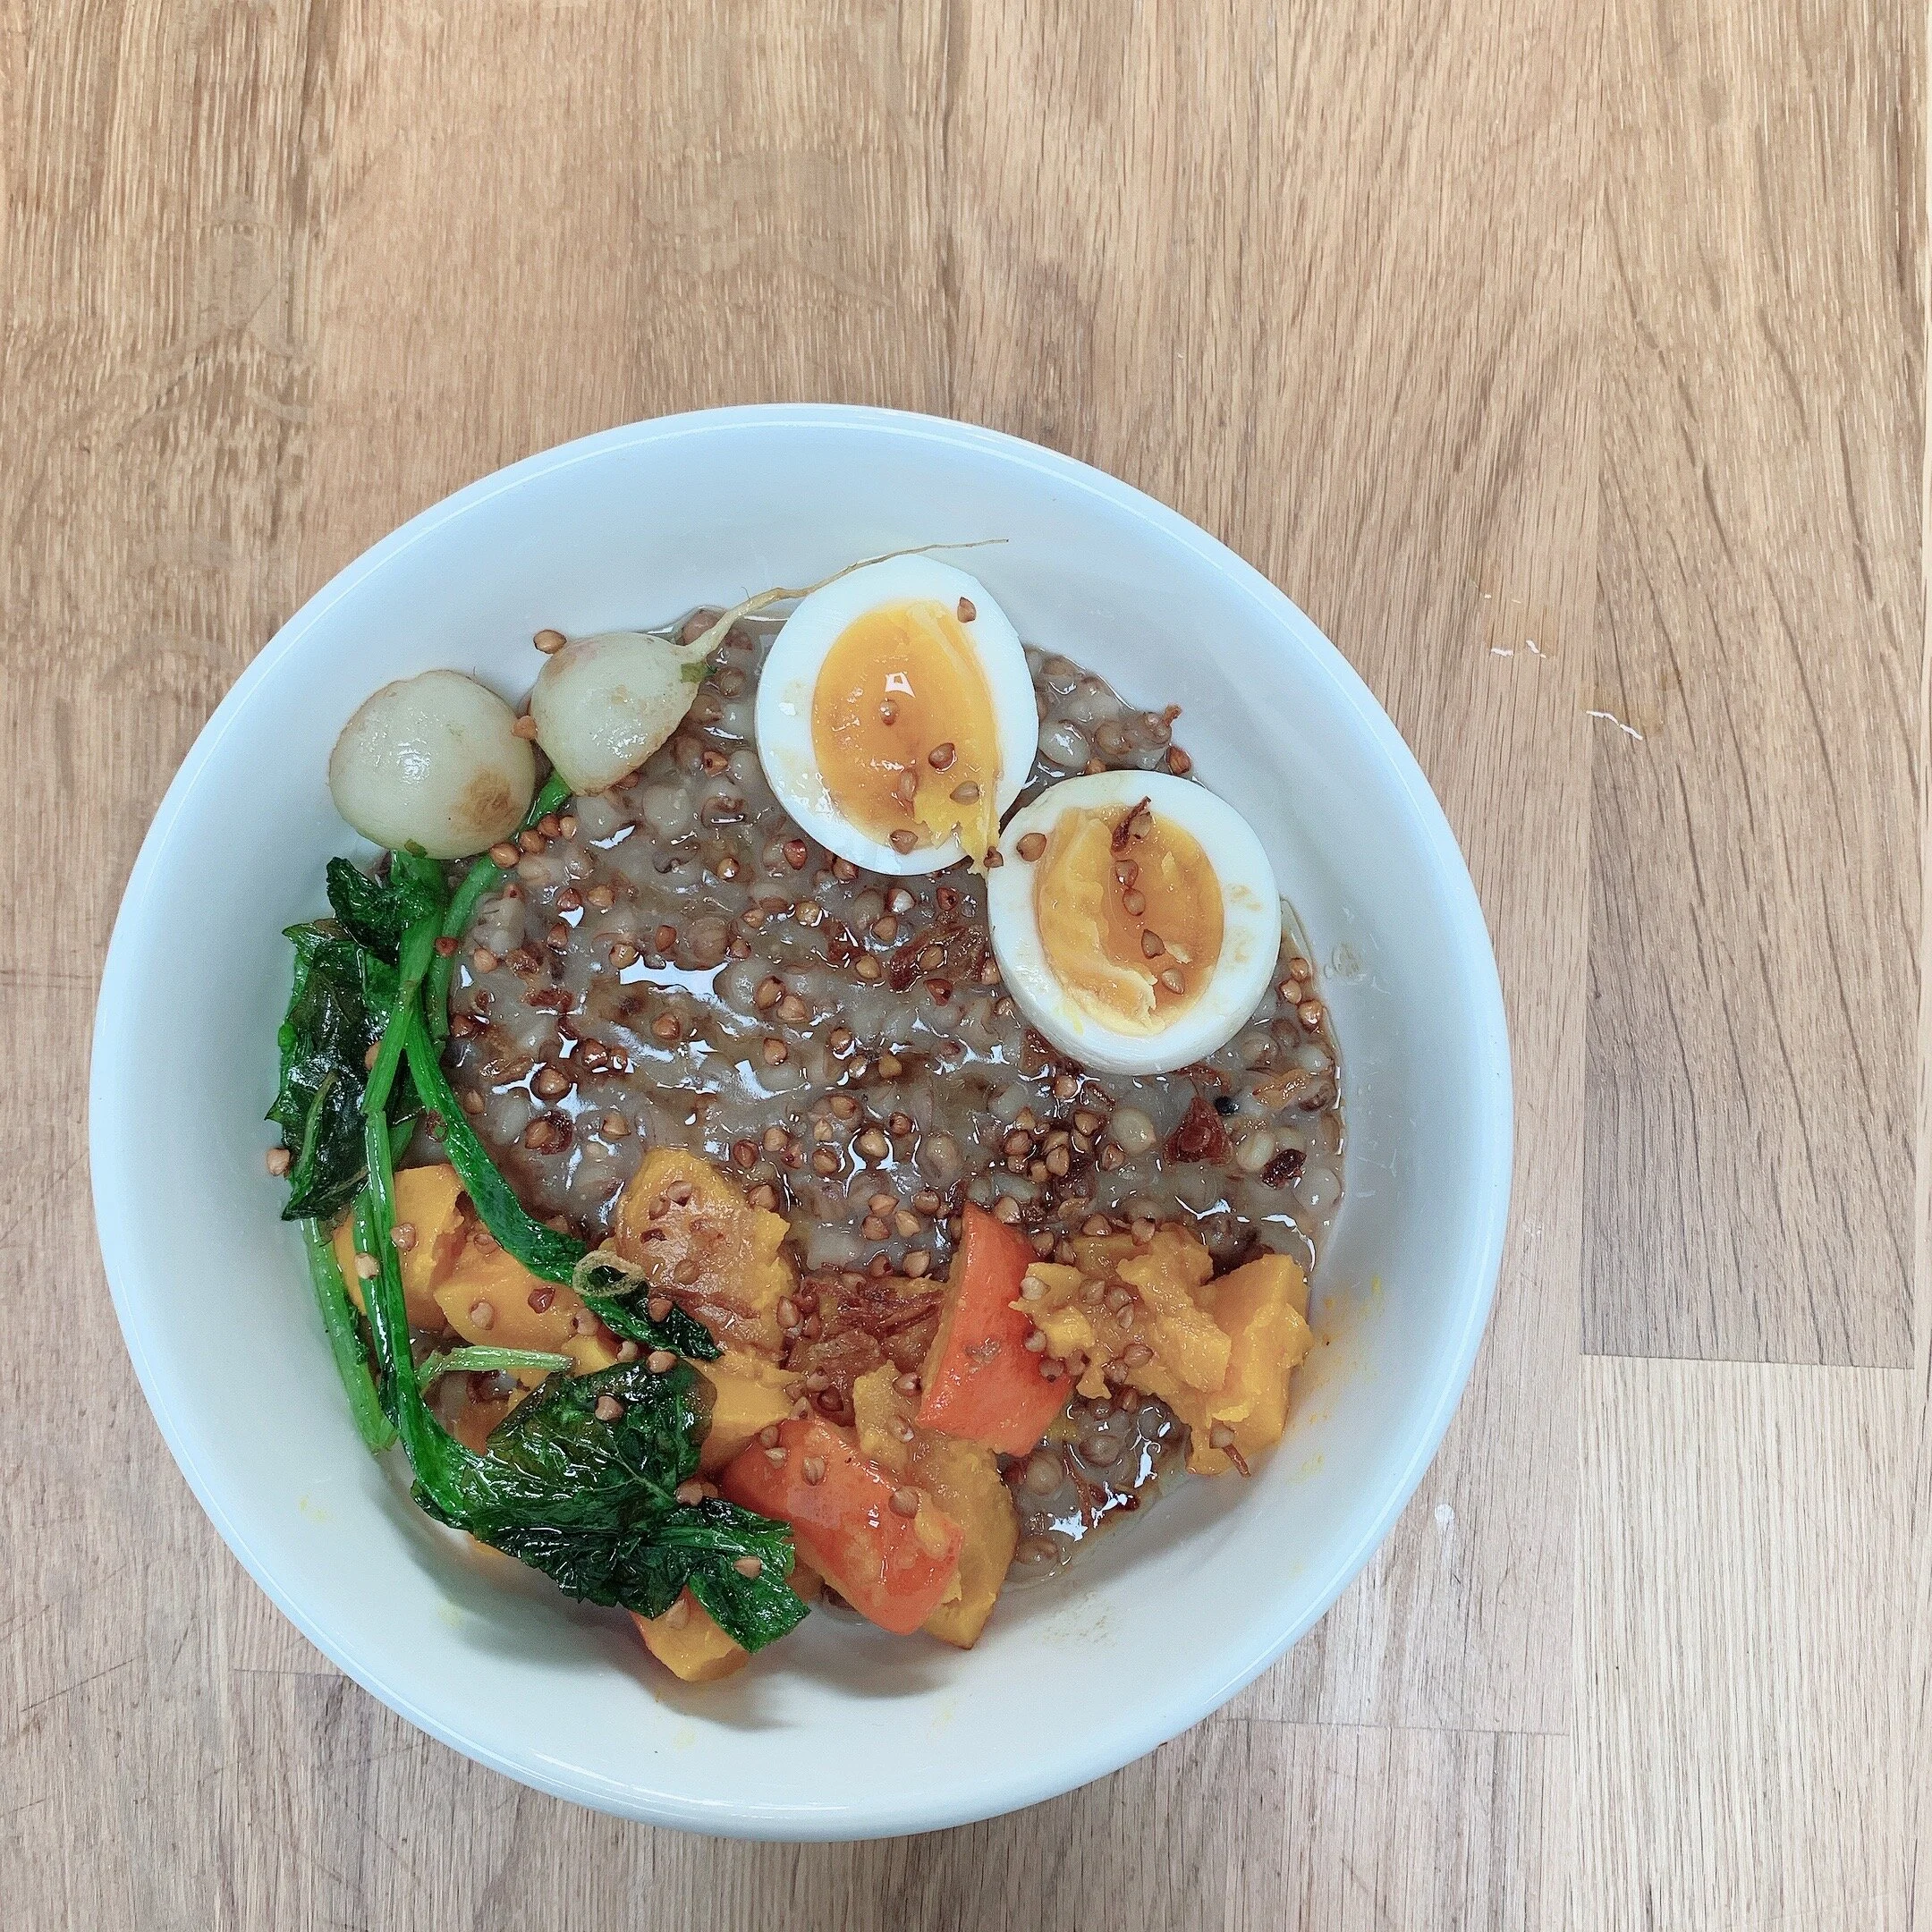
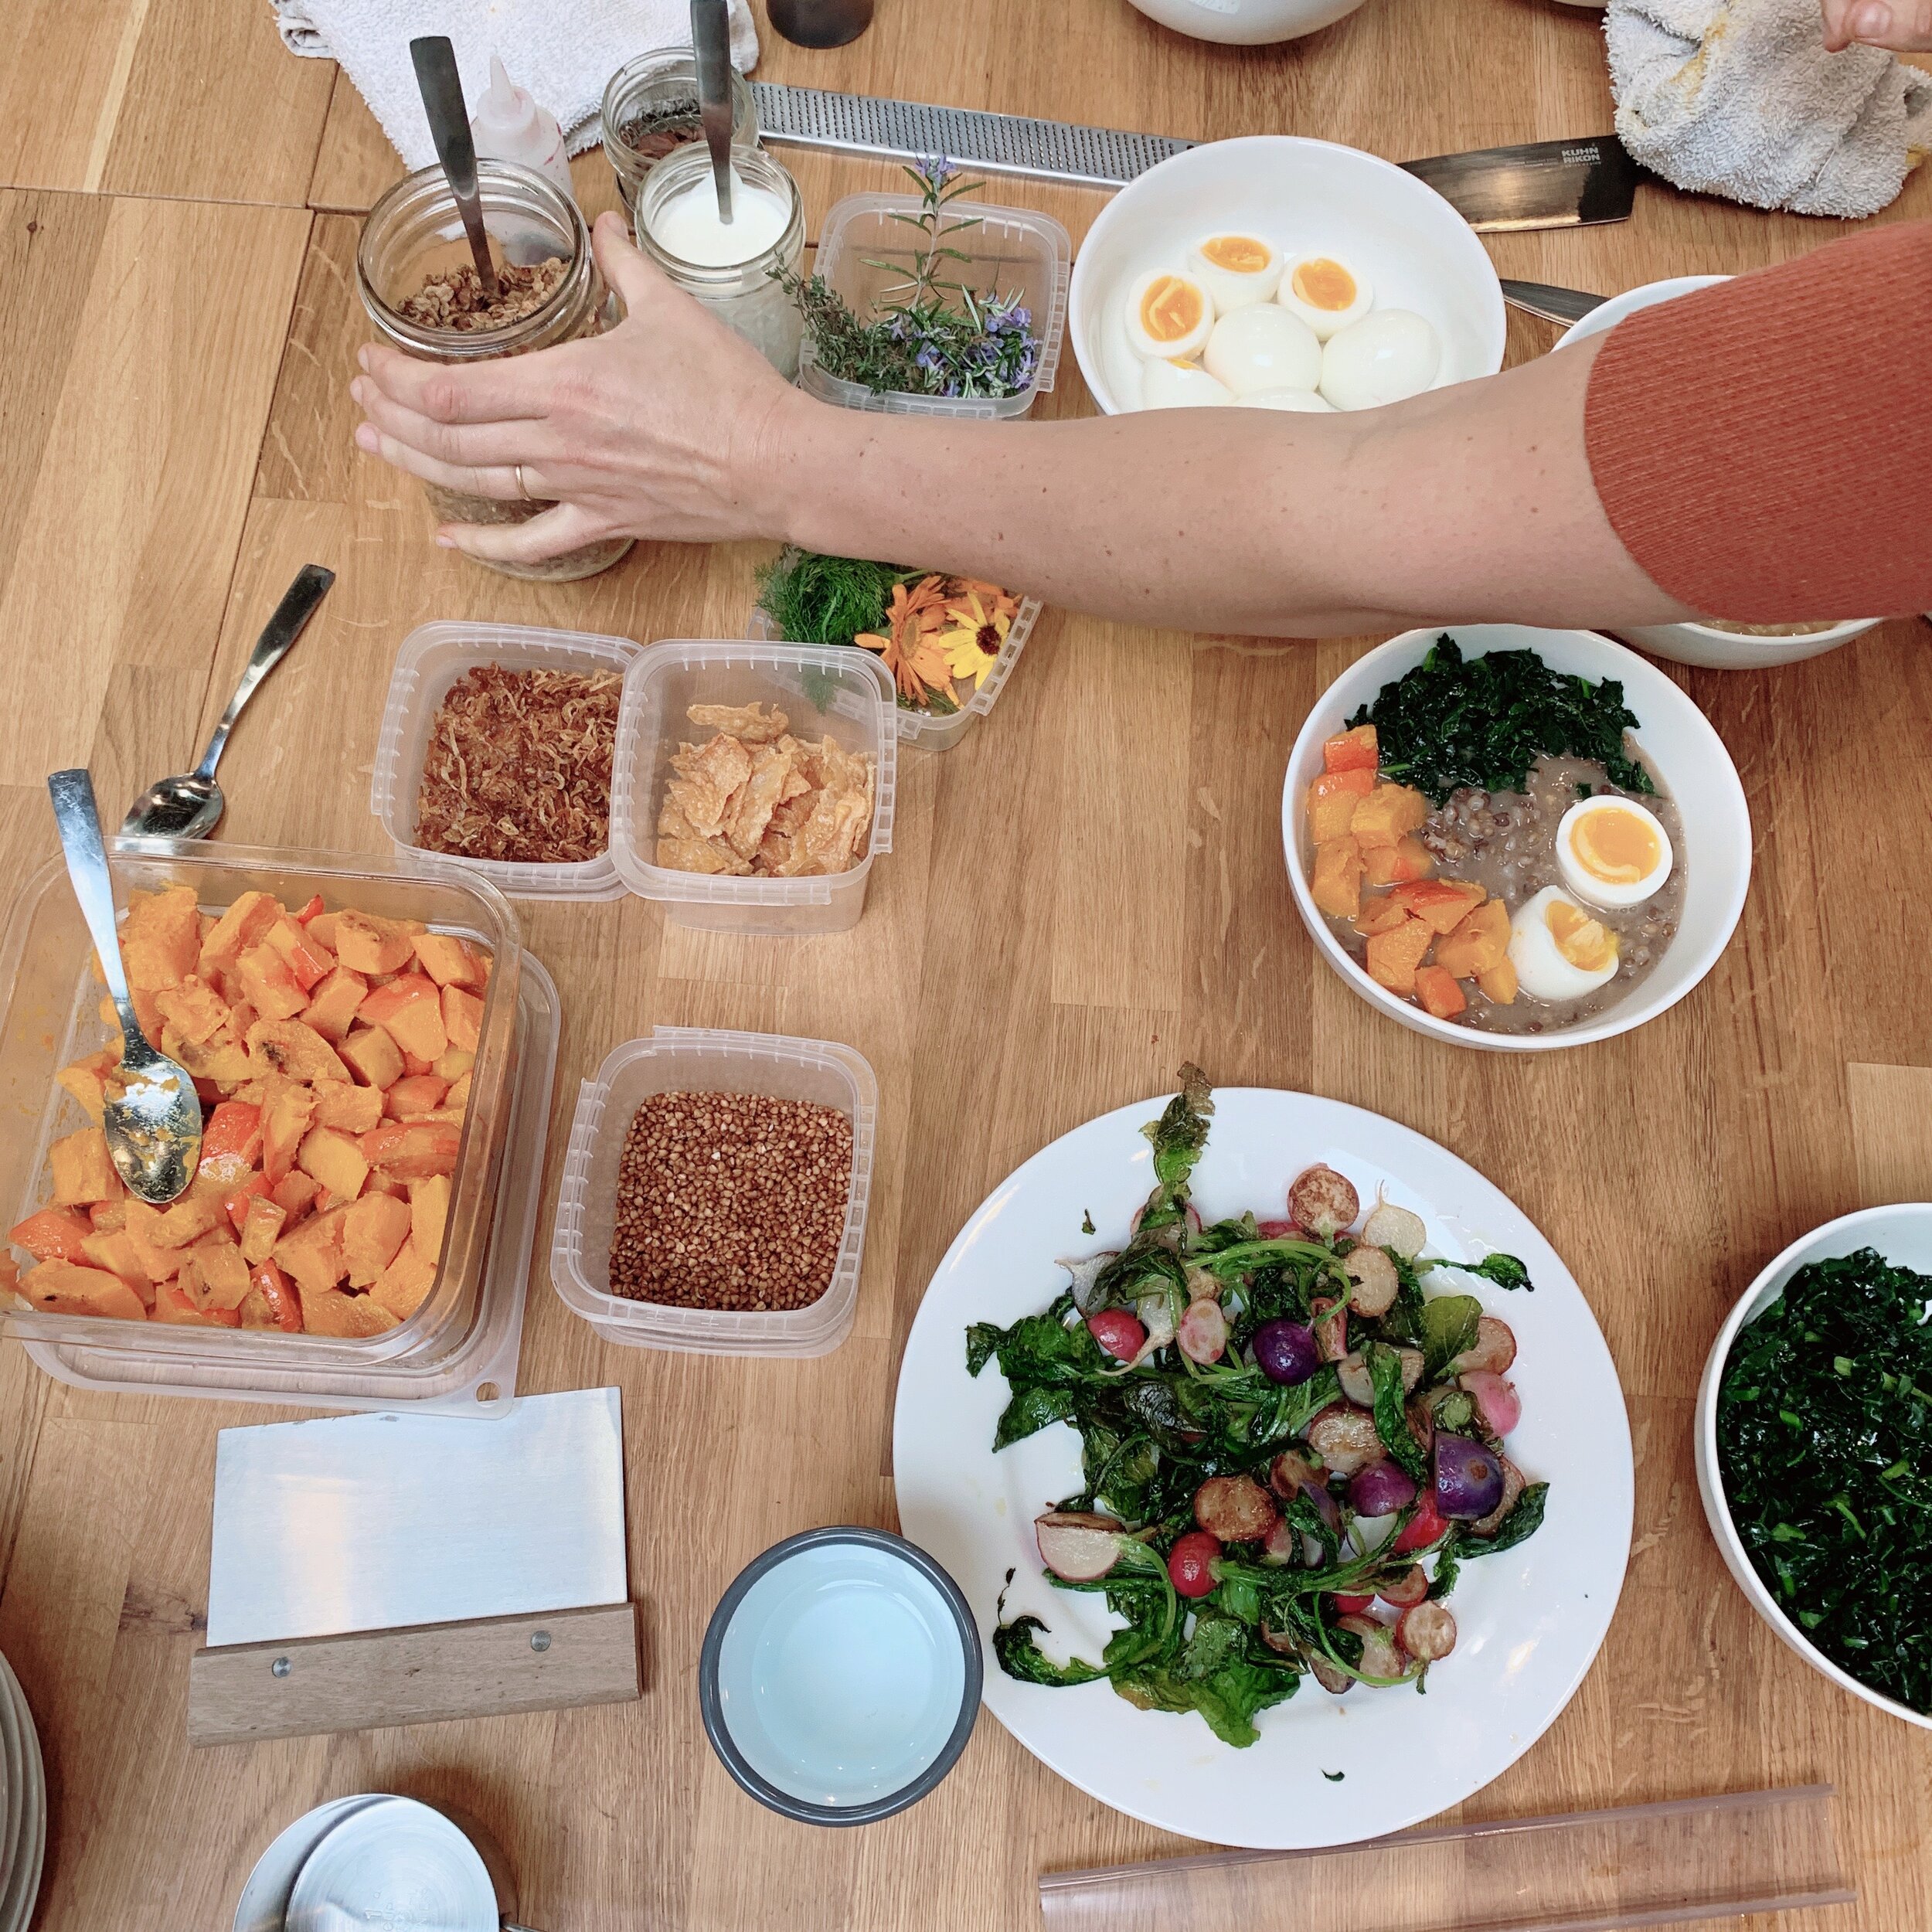
Savory millet porridge with seared radish, tamari greens, and crispy shallot
Serves 4.
Porridge
1/2 cup plus 2 tablespoons dry millet
1 cup chicken or vegetable stock
3-4 cups water
1 bay leaf
Up to 1/2 teaspoon kosher salt, divided
1/4 teaspoon white pepper, plus more to taste
2 tablespoons shallot oil (or grapeseed or canola oil, if not making crispy shallots)
1 tablespoon tamari
1 tablespoon grapeseed or canola oil, divided
4 radishes or tokyo turnips or radishes, preferably with leaves attached, halved
4 cups chopped leafy greens, such as dandelion, mustard, kale, or chard
1-1/2 tablespoons crispy shallots (optional, recipe below)
4 soft-cooked eggs (recipe below), peeled and carefully halved
Nasturtium flowers or other edible flowers for garnish (optional)
In a medium to large saucepan over medium heat, toast the millet until fragrant, about 2 minutes, then rinse. Remove 2 tablespoons of millet and set aside. Add remaining millet back to the pot.
Add the stock, 3 cups of water, and the bay leaf to the pot and bring to a boil. Reduce to a simmer and cook for 15 minutes, stirring occasionally. Remove the bay leaf and cook for another 5 to 10 minutes, adding more liquid as needed. Stir in 1/4 teaspoon salt, 1/4 teaspoon white pepper, and reserved toasted millet. Keep warm until ready to serve. Note: Porridge can also be made in a slow cooker/crockpot by cooking grain and liquid overnight on the lowest setting.
While the porridge cooks, prepare the tamari oil, greens, and radish. Tamari oil: Blend 2 tablespoons shallot oil with 1 tablespoon tamari and a pinch of salt. Set aside. More tamari oil will be made than needed and can be held up to 1 month in the refrigerator.
Radish: Heat 1-1/2 teaspoons grapeseed oil in a large sauté pan over medium-high heat. When the pan is hot, place the radishes cut side down and sear until slightly browned, then flip and cook another minute on the other side. (Try to keep the radish leaves off the pan until the end of cooking so they just slightly wilt.) Transfer the radishes to a plate and sprinkle with salt. Greens: In the same pan, reduce heat to medium and add the remaining 1 tablespoon of oil, followed by the leafy greens and a splash of water. Cook until wilted and toss with a drizzle of the reserved tamari oil.
To serve: Place a mound of greens in each serving bowl and ladle on 1 cup of porridge. Top with halved egg and the seared radish halves. Drizzle the top with more tamari oil and garnish with the crispy shallots and nasturtium flowers, if using.
Soft-cooked eggs: Bring a pot of water large enough to hold eggs to a boil then reduce to a simmer. Add eggs and cook for exactly 7 minutes. Transfer eggs to ice water bath for at least 2 minutes then keep at room temperature until used.
Crispy shallots (optional, but delicious)
Makes 1/3 cup crispy shallots and 1/4 cup shallot oil. There will be extra - shallots keep for up to 1 week and shallot oil for up to 6 months refrigerated.
1/3 cup grapeseed or canola oil
1 large shallot, very thinly sliced
Kosher salt to taste
Place the oil in a small saute pan and heat over medium heat. Add the shallot slices in a single layer and cook until golden brown, stirring occasionally. Remove the shallots, let cool on paper towels and sprinkle with salt. Set aside.
Substitution possibility notes:
Other whole grains, such as steel-cut oats, brown rice, buckwheat, or quinoa. For grains that cannot be eaten toasted, such as brown rice, cook the additional 2 tablespoons of grain in the liquid rather than adding them at the end (step X). Leftover, precooked grains can also be used for porridge by decreasing the stock and water content in half and adding more liquid as needed. For all grains, keep an eye on water level and add more liquid, grain, or time, as needed to create desired porridge consistency.
Tokyo turnips are a type of salad turnip. They are much smaller and juicier than a traditional turnip and can be eaten raw.
This is a great opportunity to use leftover protein from a previous meal - pulled chicken is classic on porridge (drizzle any remaining chicken juices into or on top of porridge as well!), but other cooked meats, beans, tofu, or seared fish would also work.
Sweet Cardamom Porridge with Berry and Toasted Bits
Serves 6-8.
2 cups steel cut oats or other grain/grain mix (I use a mix of 6 different grains including heirloom grains like kamut and amaranth, but oats are delicious in this application as well)
6-8 cups water (can substitute some water with milk of choice)
2-4 tablespoons brown sugar
3-5 whole cardamom pods, crushed
Salt to taste
Toppings (see ideas below)
Heat oats with 6 cups water, 2 tablespoons brown sugar, and 3 crushed cardamom pods until simmering. Cook, stirring occasionally, until a thick porridge (about 20 minutes). Add more liquid, brown sugar, cardamom, and salt until your desired texture is achieved.
Serve hot with a selection of toppings (see below - mandatory to have toppings).
Topping ideas
Pop-up combo: Almond-cardamom crisp, elderberry syrup, yogurt drizzle, bay nut dust.
Berries/other fresh fruit
Roasted fruit (in the summer, I like to roast peaches and nectarines, in the spring I like to roast rhubarb tossed in brown sugar)
Berry or other syrups (I used elderberry syrup that I foraged/made at the pop-up)
Crispy granola (I made an almond-cardamom crisp for the pop-up)
Toasted nuts: Hazelnuts, almonds, walnuts…
Toasted seeds: Sesame, flax, sunflower…
Yogurt/kefir/buttermilk/cream
Sea salt
Dusting of cinnamon/other warm spice
Shaved chocolate
All recipes courtesy of Kristen Rasmussen. Learn more about her culinary adventures at Rooted Food, or follow her on Instagram @rootedfood.


Pasta with Butternut Squash, Brown Butter, Mushroom Confit, Toasted Pepitas, and Fried Sage

Serves 4-6
1 small butternut squash, seeds removed and reserved, cubed
½ stick unsalted butter
6 fresh sage leaves
Salt to taste
Olive oil
1 batch prepared mushroom confit
½ cup grated Parmigiano-Reggiano, divided
1lb fresh fresh fettucine or dried pasta
1. Preheat an oven to 350 degrees. Place squash cubes on a sheet tray and drizzle with olive oil and sprinkle with salt. Toss to distribute. Roast the squash until tender. Puree in a blender or food processor until smooth.
2. Rinse the squash seeds clean from squash residue. Spread on a sheet tray and toss with olive oil and salt. Roast at 350 degrees until browned and crispy.
3. Melt butter in a large saucepan and add sage leaves. Fry the leaves until they are crisped, and the butter begins to brown and smelly nutty. Strain the leaves from the butter and place them on a paper towel to drain. Sprinkle with salt. Reserve the butter in the pan off of the heat.
4. Bring a large pot of water to a rapid boil. Add enough salt to the water so that it tastes of the sea. Cook pasta until al dente (2-4 minutes or according to package instructions). Reserve 1 cup of pasta water and drain pasta.
5. To the saucepan with the butter, add the squash puree, pasta water, and pasta. Cook over low heat until the sauce coats the pasta. Add ¼ cup of Parmigiano-Reggiano, and stir until creamy. Adjust seasoning.
6. Portion the pasta into bowls and top with more cheese, a scoop of mushroom confit, toasted pumpkin seeds, and fried sage. Serve immediately.
Handformed Pasta Dough
Serves 4
400 g Semola Flour
180 g water
Combine ingredients in a bowl. Mix until cohesive.
Knead on a wooden surface for 5-10 minutes or until dough springs back to the touch.
Cover and rest for at least 30 minutes. (Longer than 1 hour, rest in fridge, tightly wrapped).
Shape as desired.
Store, uncovered in one layer on the counter, or in the refrigerator, until ready to cook.
Cook in a large pot of heavily salted water until “al dente”, about 4-6 minutes.
Reserve 1 cup of pasta water to help bind sauce to pasta.
All recipes courtesty of Leta Norton. You can follow Leta and learn about upcoming classes and pasta events on Instagram @lemneats
Kitchen Club: Week 1 // Oct 17


Our first Kitchen Club was all about squash. We sipped wine, butchered a squash or 5, and made all sorts of tasty, roasty, spiced and seasoned squash. Thanks to Corey Pressman for showing us some delicious new ways to cook this ubiquitous fall veg. I know what I’ll be eating for dinner this weekend!
Roasted Butternut Squash 1.0
Butcher and peel one butternut squash. Cut into large chunks.
Spread on a baking tray and drizzle with a generous amount of olive oil, salt and pepper.
Roast for about 20 minutes (until soft but not mushy) at 400 degrees.
Take out of the oven, scrape into a large bowl, and toss with chopped pecans and a few spoonfuls of Sweet Heat spice blend*.
Sweet Heat Spice Blend (from the Acadiana Table Cookbook)
2 tablespoons light brown sugar
2 tablespoons ground cumin
1 tablespoon ground coriander
1 tablespoon chili powder
1 tablespoon sweet paprika
1 teaspoon ground cinnamon
1 teaspoon ground allspice
1 teaspoon ground ginger
½ teaspoon. cayenne
½ teaspoon turmeric
½ teaspoon ground cloves
Combine all ingredients in a bowl, mix. Transfer to an airtight container and sprinkle on anything and everything (roasted carrots are
Roasted Butternut Squash v2.0
Follow first three steps from version 1.0.
Transfer to large bowl, drizzle with maple syrup (2 tablespoons) and curry powder (2 teaspoons).
French Macarons

Ingredients
100 g egg whites
100 g sugar
112 g almond meal (aka ground almonds or almond flour) . Fine ground and blanched is preferred
115 powdered sugar
Preheat the oven to 300ºF. Line 2 rimmed baking sheets with silpat mats or parchment paper.
If your almond meal is very coarse, grind it with the powdered sugar in a food processor until fine. Sift the almond meal-powdered sugar mixture twice through a mesh sieve.
Place egg whites in the bowl of a stand mixer, and begin to beat on medium-high. When the eggs are quite frothy, and you no longer see liquid at the bottom of the bowl, gradually add granulated sugar 1 tablespoon at a time until fully incorporated. Continue to beat the egg white mixture until glossy and stiff peaks form when you lift the beaters. Stir in desired gel coloring.
Add the sifted almond mixture, and gently fold it into the meringue using a flexible silicone spatula. Lift from the bottom, up around the sides, and toward the middle. It’s ok to be a little rough with the mixture, as you are going for a consistency that will slowly spread on the trays, and smooth out after piping.
To get the right texture, you will need to continue to mix, but not go too far. Using the flat of the spatula, "punch" down into the center of the batter, then scrape more batter from the sides to the center, and punch again. You will need to repeat this 10-15 times (or more, depending on your arm strength and the beginning texture of your batter) until the batter slowly and continuously drips back into the bowl when you scoop it up with the spatula. Think of the consistency of molten lava. For the best results, punch the batter a few times, check the consistency, then punch a few more times, etc. Do not make the batter too runny or the macarons won't rise as they should, and will be flat pancakes.
Pour batter into a pastry bag fitted with a small round tip. Twist and clip the top of the bag to avoid overflow. On your prepared baking sheets, pipe out 1-inch rounds in the circles you drew.
Holding the baking sheet in both hands, rap each baking sheet firmly on the counter one or two times. This smooths out the tops and helps form the "pied" or foot on the bottoms of the macarons. Allow the piped macarons to dry, uncovered, for at least 15 minutes. The macarons should form a very thin, leather like, smooth crust where, if you tap it lightly with your finger, the batter will not stick to your finger. If after 15 minutes, the batter is still sticky, let it dry longer. This may take up to an hour on humid days.
Place both baking sheets in the oven and bake for 10-15 minutes. After the first 2 minutes, open the oven to allow any excess humidity to escape. Halfway through, swap oven racks and rotate the sheets for even baking. The macarons are done when they are baked all the way through and the shells are just hard. Take care to not underbake (insides will still be mushy) or overbake (tops will begin to brown). Remove them from the oven, and cool on baking sheet placed on a wire rack.
When fully cooled, assemble the macarons with your choice of filling. The assembled macarons can be stored in an airtight container in the freezer.
Handmade Pasta - Recipes and Class Notes from September 12th
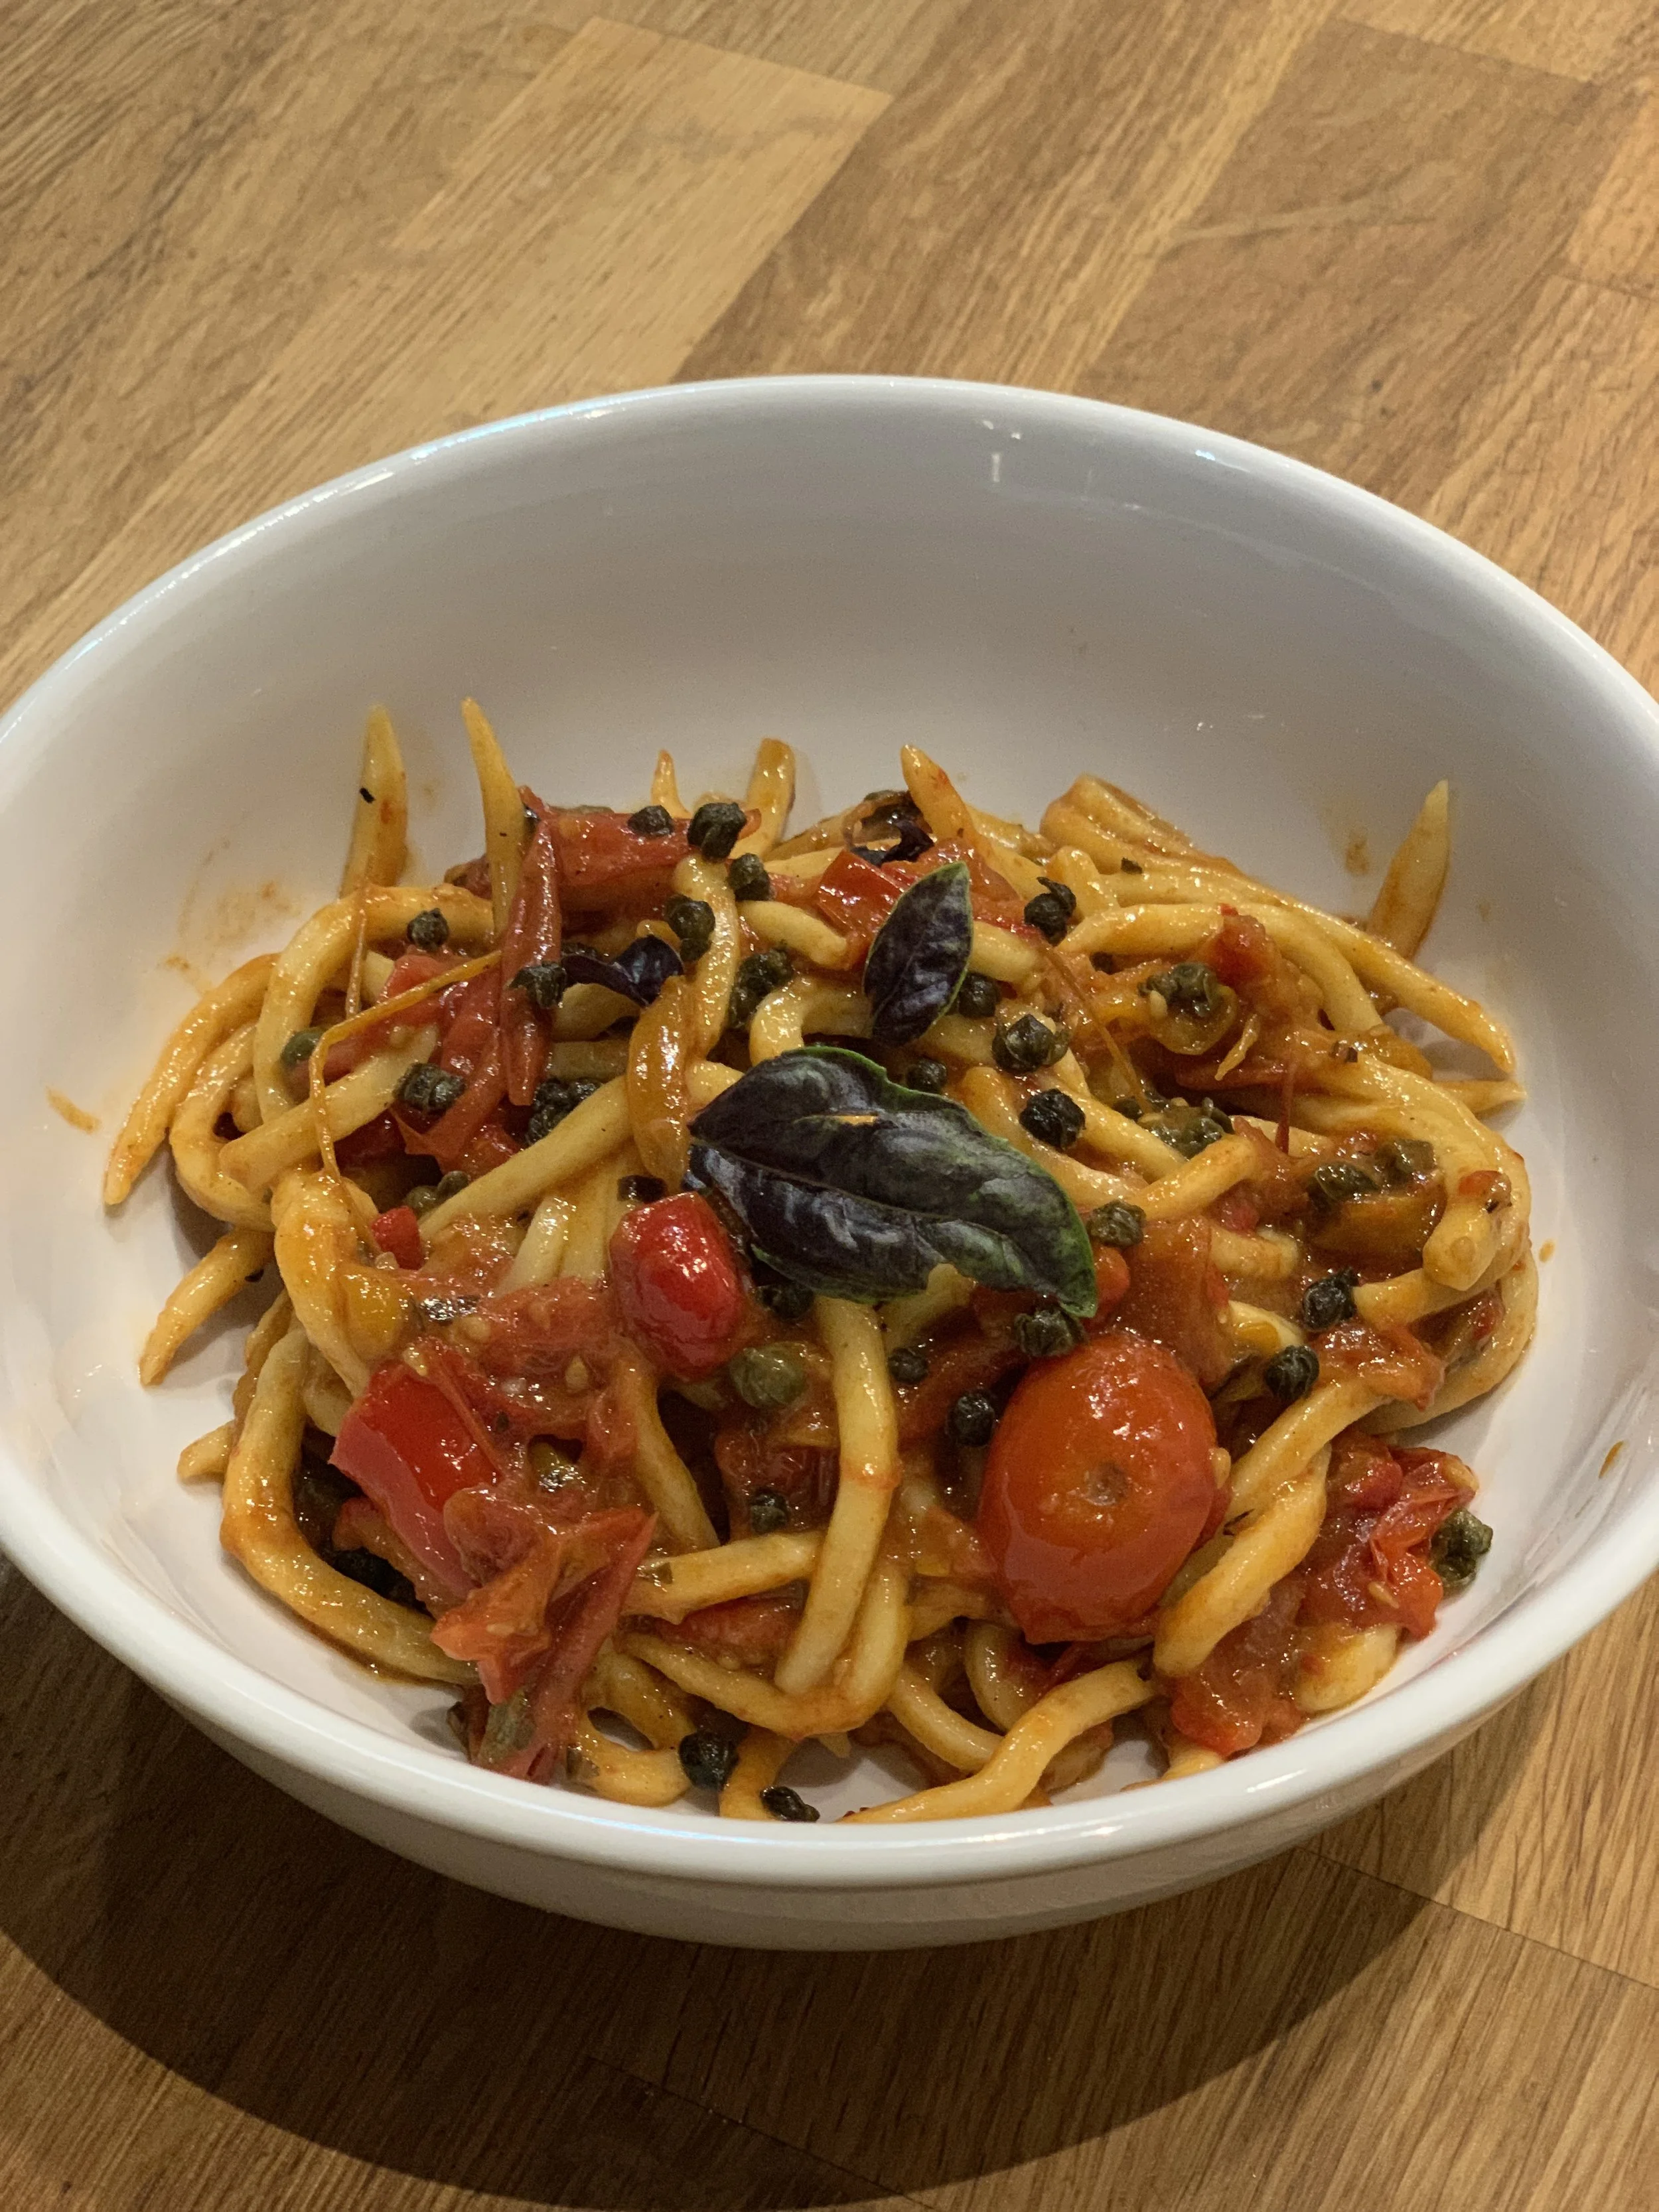
Late Summer “Jam” Sauce
Serves 4-6
1 lb Italian peppers or bell peppers (red, orange, yellow), sliced into thin strips
2 pints cherry tomatoes, halved
2 cloves garlic, peeled
1 bunch basil, chopped
Olive oil, salt, balsamic vinegar, to taste
1lb pasta
Preheat the oven to 300 degrees.
Arrange halved tomatoes in on layer on a baking sheet, cut side up. Drizzle with olive oil and season with salt. Roast in the oven until they resemble raisins, and are sweet and chewy, approximately 1-3 hours.
Meanwhile, in a large skillet, cook peppers on low heat in a ridiculous amount of olive oil. Season with salt throughout the process. Cook the peppers until they resemble jam, 1-3 hours.
Remove the tomatoes from the oven. Combine with the peppers in the skillet. Add the garlic cloves and basil and cook on low until the flavors have melded, about 10 minutes. Adjust seasoning with salt and balsamic vinegar if desired.
While the flavors in the sauce marry, boil a large pot of water and prepare your favorite pasta. Reserve some of the starchy pasta cooking water.
Remove the garlic cloves from the sauce. Toss the pasta with the sauce and cooking water over low heat until everything is combined and creamy. Top with more basil and olive oil.

Field Trip to The Croft Farm: Handmade Pasta

Semolina Pasta Dough
Serves 4
400g Semolina flour (finely ground durum wheat flour)
180g water
Combine flour and water in a bowl with a fork or your hands until the dough comes together in a cohesive mass. Turn the dough out onto a wooden surface and knead until smooth and elastic, about 5-10 minutes. If the dough is too dry, spritz with a bit of water. If the dough is too wet, sprinkle the work surface with flour and incorporate the flour into the dough while kneading. Wrap the dough tightly and allow to rest 30 minutes to overnight. Shape as desired.
Cook shaped pasta in heavily salted, rapidly boiling water until al dente. Reserve some pasta cooking water to incorporate into your sauce.
Shaped pasta can be dried on a countertop, stored in the refrigerator, or frozen.
Egg Pasta Dough
Serves 4
400g 00 Flour
4 eggs
Combine flour and eggs in a bowl with a fork or your fingers to form a cohesive mass. Turn the dough out onto a wooden surface and knead until smooth and elastic, about 5-10 minutes. Wrap tightly and rest 30 minutes to overnight.
To shape, portion the dough into four pieces. Working with one portion at a time, and keeping the remaining portions wrapped, flatten the dough until it is thin enough to feed through the widest setting of a pasta machine. Flour the dough and feed it through the widest setting of a pasta machine. Fold the dough into thirds and feed through the machine again, forming a broad rectangle the width of the pasta machine. Repeat the lamination process until the dough feels smooth, 3-6 times. Adjust the pasta machine to the next widest setting, and pass the pasta sheet through once. Repeat this process, adjusting the machine one notch narrower with each pass until the pasta sheet reaches the desired thinness. Cut and shape as desired.
Cook pasta in heavily salted, rapidly boiling water until al dente, 2-4 minutes. Reserve some pasta cooking water to combine with sauce. Fresh pasta can be stored in the refrigerator, or frozen before cooking.
Trapanese Pesto
Makes 2 cups
1 pint cherry tomatoes, washed and stemmed
¼ cup blanched almonds, toasted
½ bunch fresh basil
½ bunch fresh parsley
1 clove garlic
1 cup olive oil
½ cup Parmesan cheese
Salt to taste
Combine tomatoes, herbs, almonds, garlic, and half of the olive oil in a blender. Blend and stream in the remaining oil until a thick sauce forms. Stir in cheese. Season to taste. Combine by spoonfuls with hot cooked pasta, and a bit of pasta cooking water until pasta is well coated and creamy.
Ravioli al uovo
Makes 12 large ravioli
1 batch egg pasta dough
1 batch ricotta filling
1 dozen eggs
1 batch browned butter with sage
Sheet pasta until thin and translucent. Pipe 2T dollops of ricotta filling onto the middle of half of the sheet spaced 2 inches apart. Create divots in each dollop large enough to hold an egg yolk. Working with one egg at a time, separate the yolk and place it gently on top of each ricotta dollop. Lay the unused half of the pasta sheet over the top of the filled pasta sheet. Using the blunt end of a biscuit cutter, seal the filling between both sheets of pasta. Cut each raviolo into desired shape (square or round). Store uncovered on a floured towel in the refrigerator. Cook within 24 hours.
Cook ravioli in small batches (2-4) in a large pot of boiling, heavily salted water for 2-4 minutes until pasta is al dente and egg yolk is still liquid. Toss in browned butter with a little pasta cooking water over low heat until coated with sauce. Serve topped with fried sage and a sprinkling of Parmesan.
Browned Butter with Sage
Makes ½ cup
½ cup unsalted butter
12 fresh sage leaves
Salt to taste
Melt butter in a large skillet. Add sage leaves and fry, stirring and scraping the bottom of pan occasionally, until butter begins to turn brown and smell caramilized. Remove the butter from the heat and reserve. Remove the sage leaves and drain on a towel. Sprinkle with salt. Reserve for garnishing cooked ravioli.
Ricotta Filling
Makes 2 ½ cups
16oz ricotta cheese
½ cup grated Parmesan cheese
Zest of 1 lemon, finely chopped
Salt, pepper, sugar to taste
Combine all ingredients and allow to sit until flavors marry, at least 30 minutes. Adjust seasoning and scoop into a piping bag.
